|
By default Mikrotik use the following LAN subnet, 192.168.88.0/24 with the gateway IP being 192.168.88.1.
For this example the Mikrotik's subnet is being changed to 10.0.0.0/24 with a gateway IP of 10.0.0.1.
There are six items that will be updated.
- Add the local address to the Mikrotik's Bridge-Local
- Add the new IP range to the Mikrotik's Pool
- Add the new address to the DHCP Network
- Change the DHCP Server to use the new Address Pool
- Change the DNS Static address
- Add the new address to the IP Service List's Available From address.
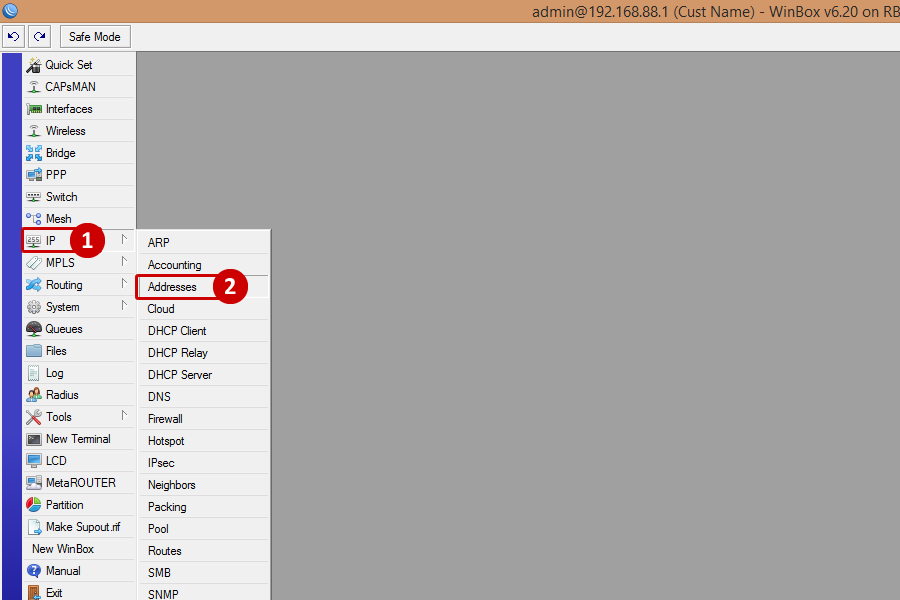
Add the Local Address
- Open Winbox and go to IP
- Go to Addresses
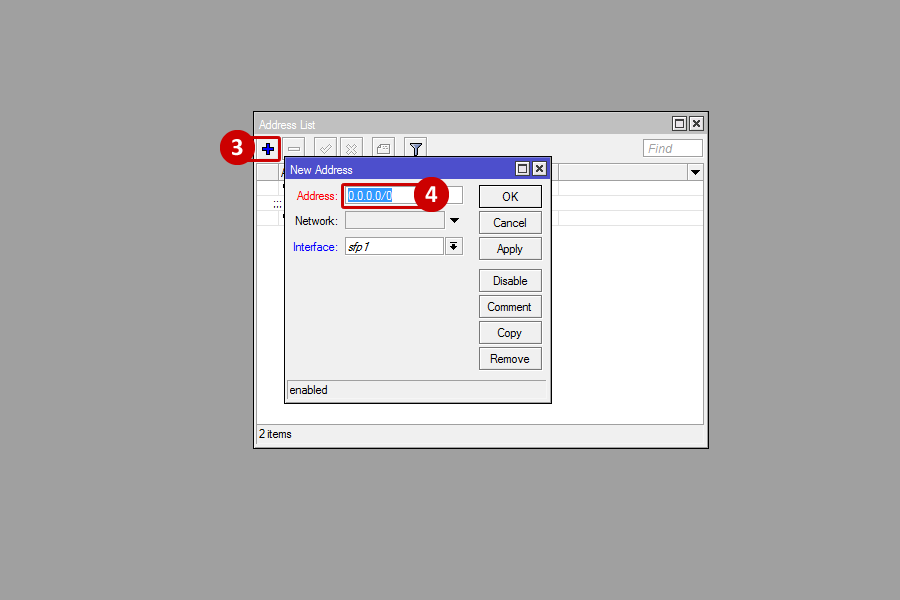
- In the Address List window, click on the Blue Plus Sign to add
- In the New Address window, select Address to type in the new address
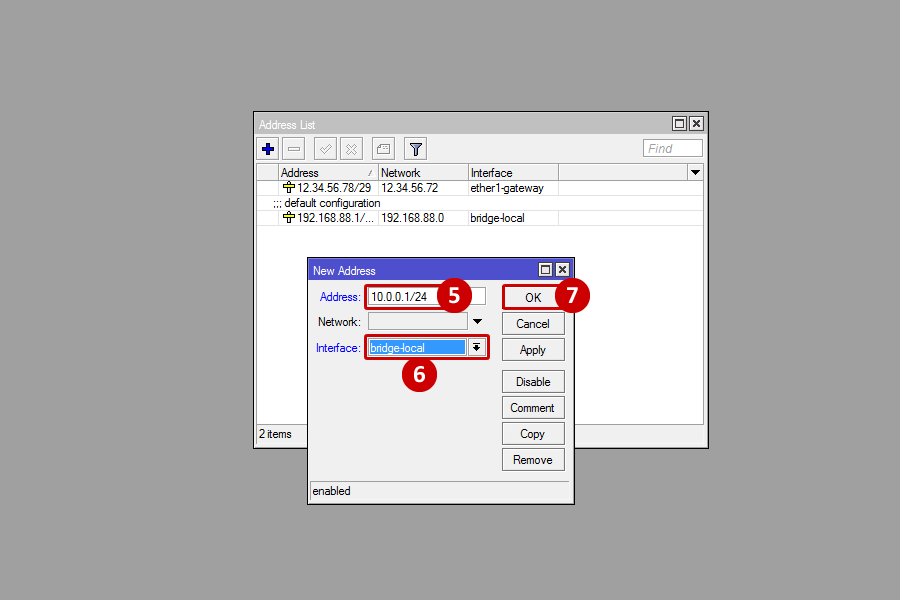
- Type in the new address: 10.0.0.1/24
- Select the Bridge-Local Interface
- Click OK
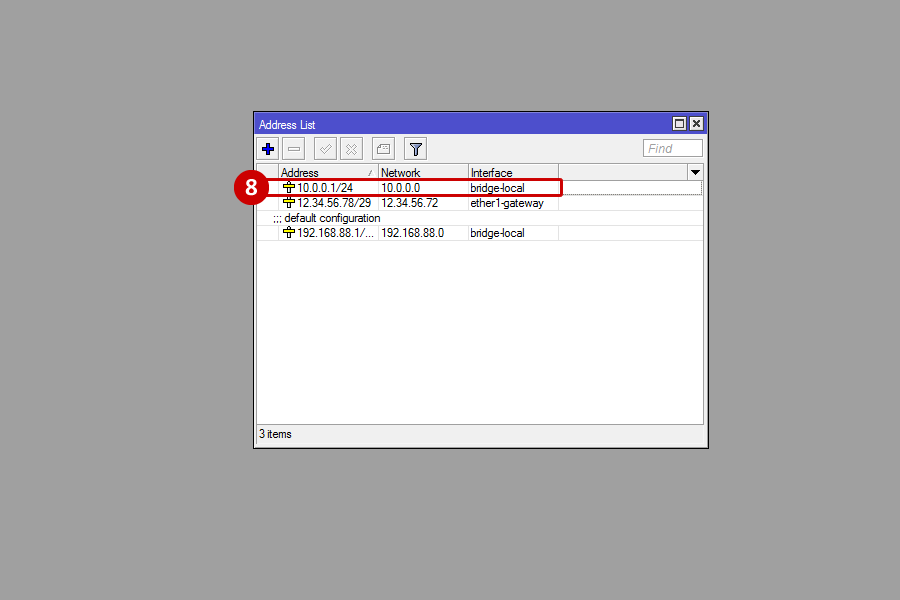
- The new address now appears in the Address List
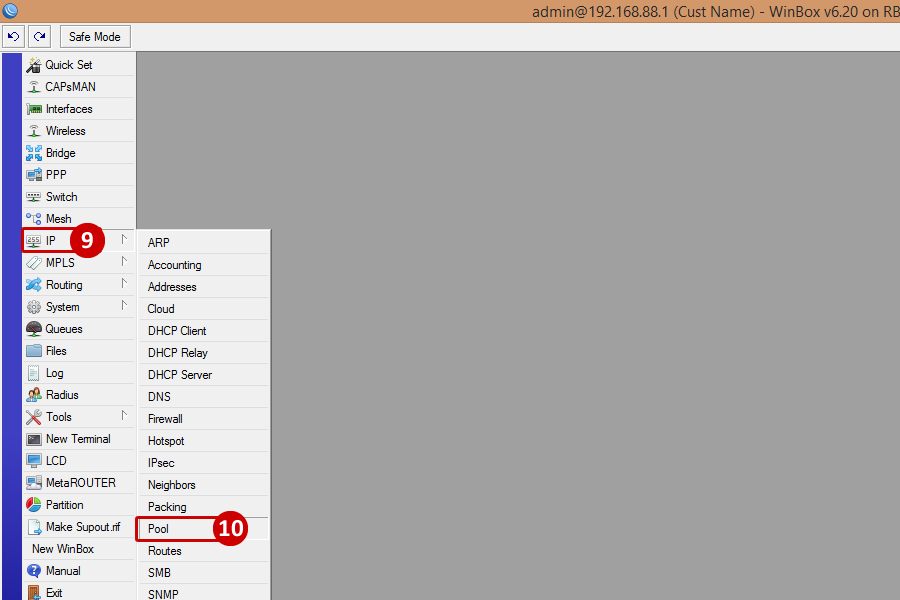
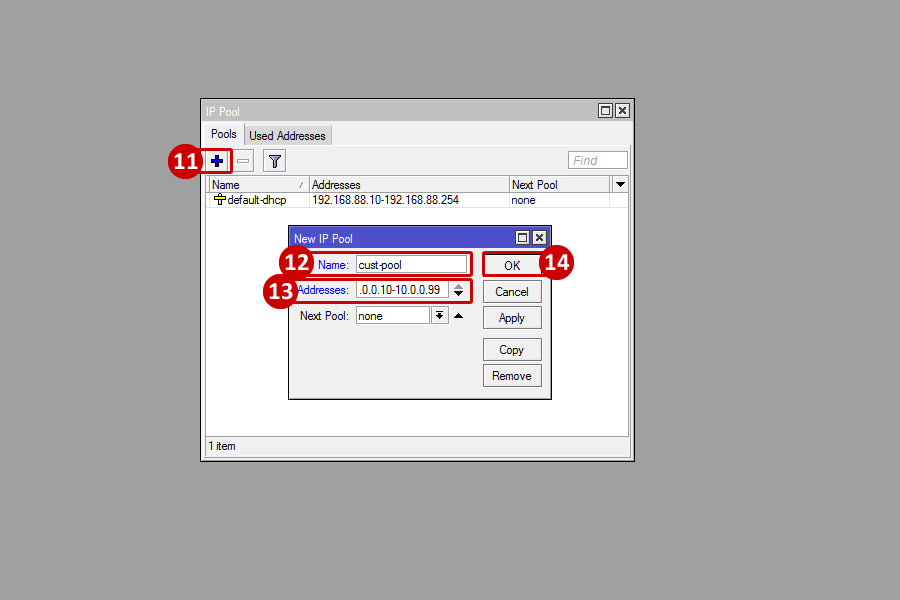
Add the New IP Range
- Go to IP
- Go to Pool
- In the IP Pool window, click on the Blue Plus Sign to add
- Enter in a Name (e.g.: cust-pool)
- Enter in the address pool range (e.g.: 10.0.0.10-10.0.0.99)
- Click OK
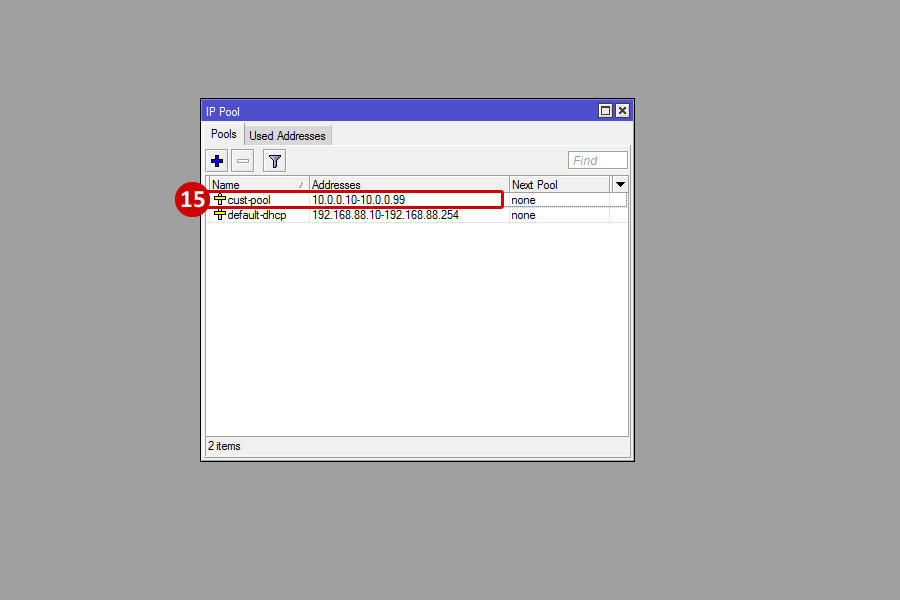
- The new IP Pool now appears in the IP Pool list
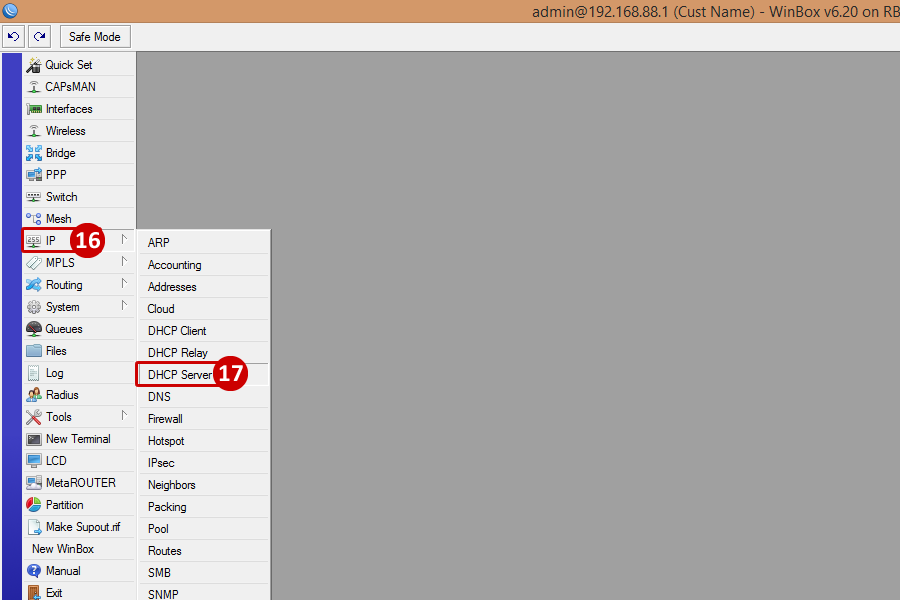
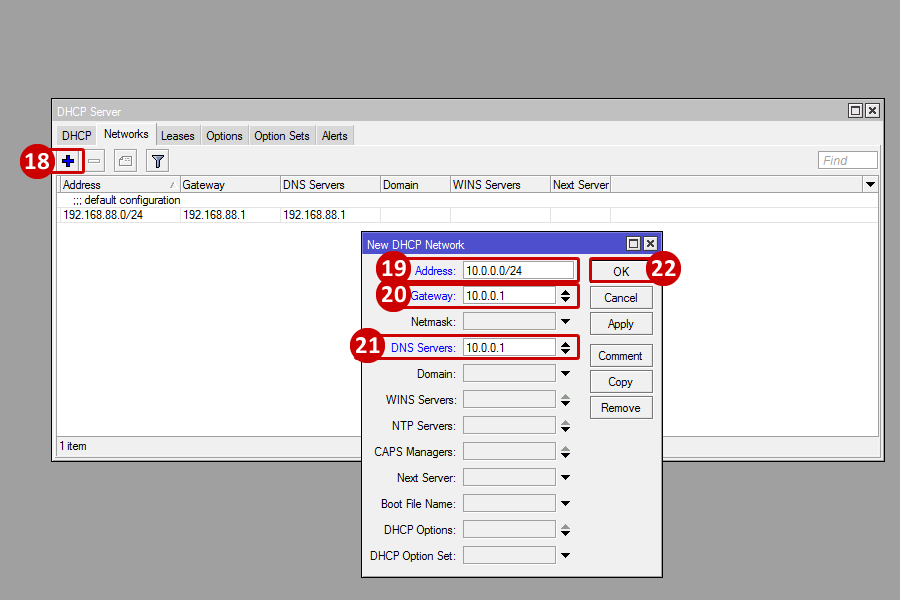
Add the New Address to the DHCP Network
- Go to IP
- Go to DHCP Server
- In the DHCP Server window, click on the Blue Plus Sign to add
- Enter in the Address (e.g.: 10.0.0.0/24)
- Enter in the Gateway (e.g.: 10.0.0.1)
- Enter in the DNS Servers (e.g.: 10.0.0.1)
- Click OK
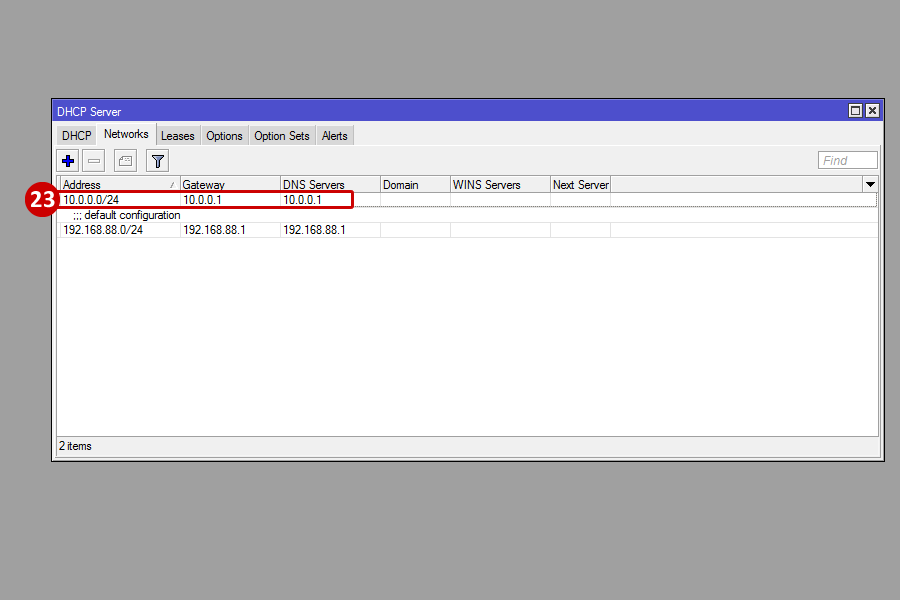
- The new netwoeks will now appear in the DHCP Server Networks list
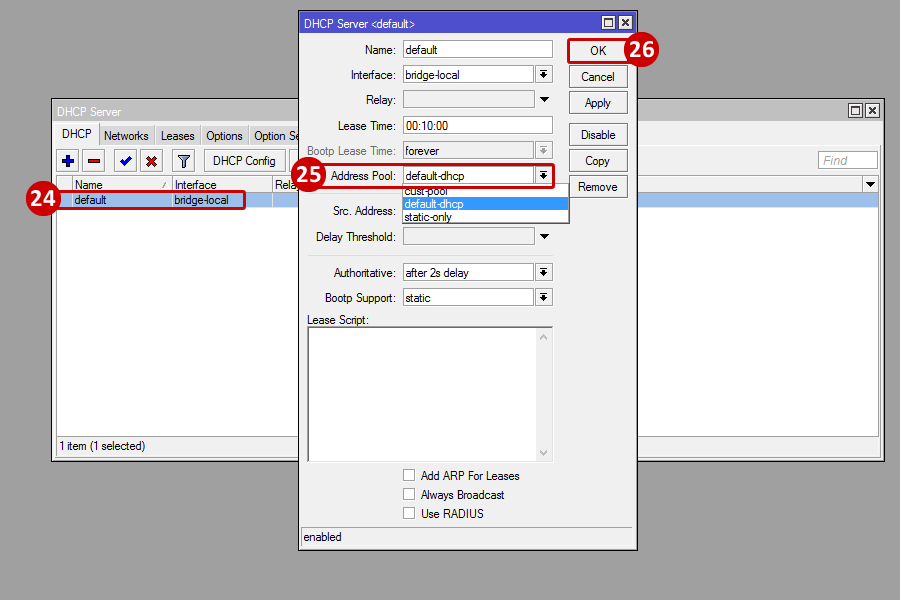
Change the DHCP Pool
- From the same DHCP Server, double click on "default" to change the Address Pool
- Go to the Address Pool drop down menu and select the pool that was just created (e.g.: cust-pool)
- Click OK
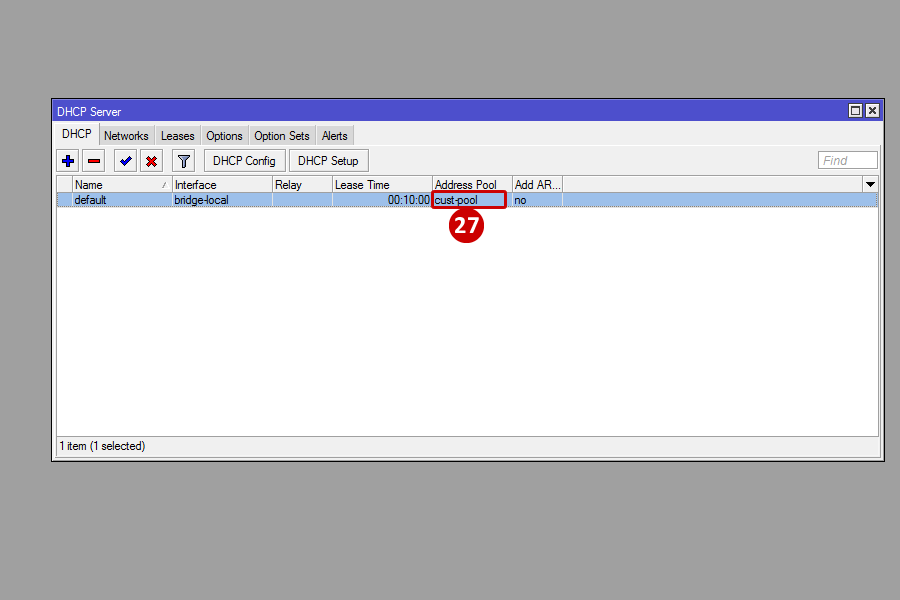
- The new Address Pool is now selected for the DHCP server
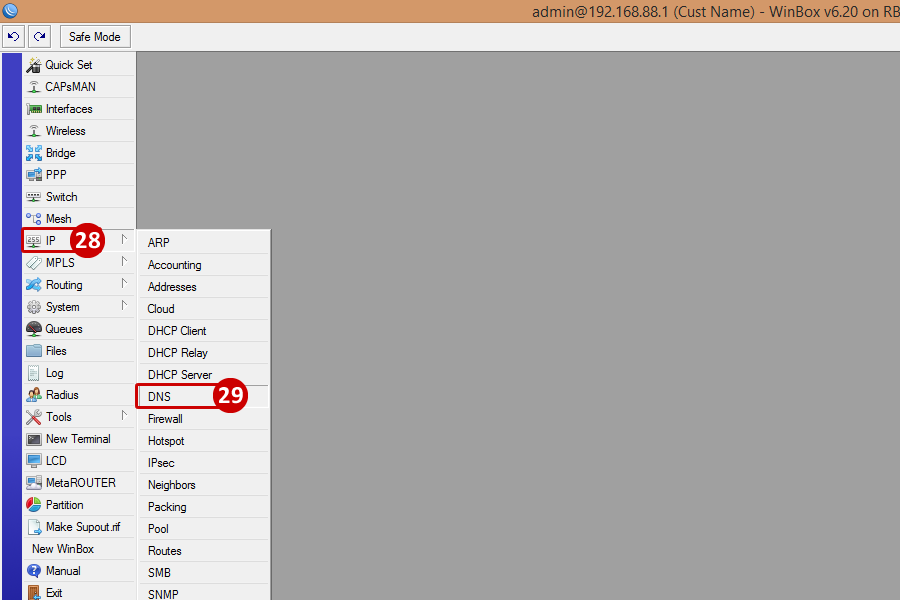
Change tge DNS Static Address
- Go to IP
- Go to DNS
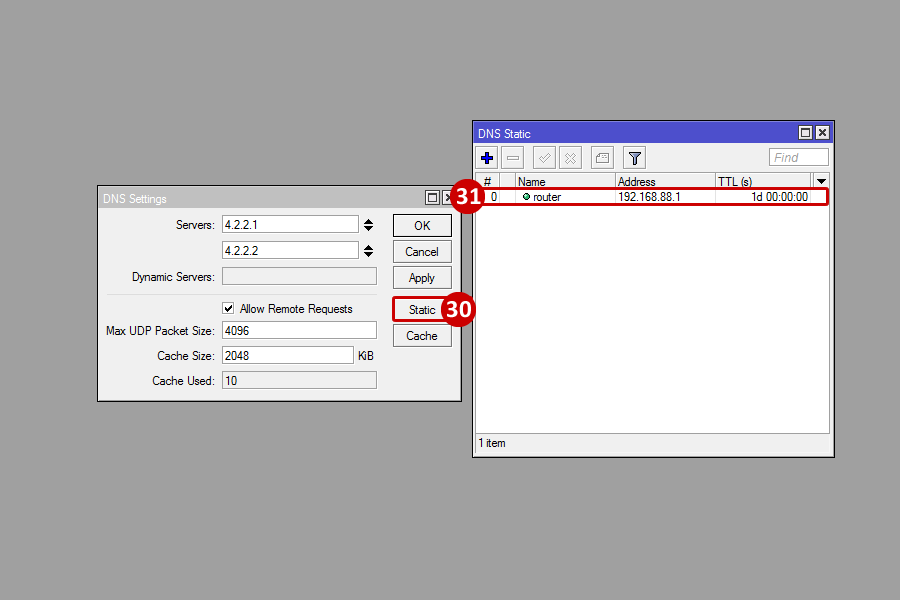
- From the DNS Settings window, click on Static
- Select the default DNS Static entry by double clicking the entry
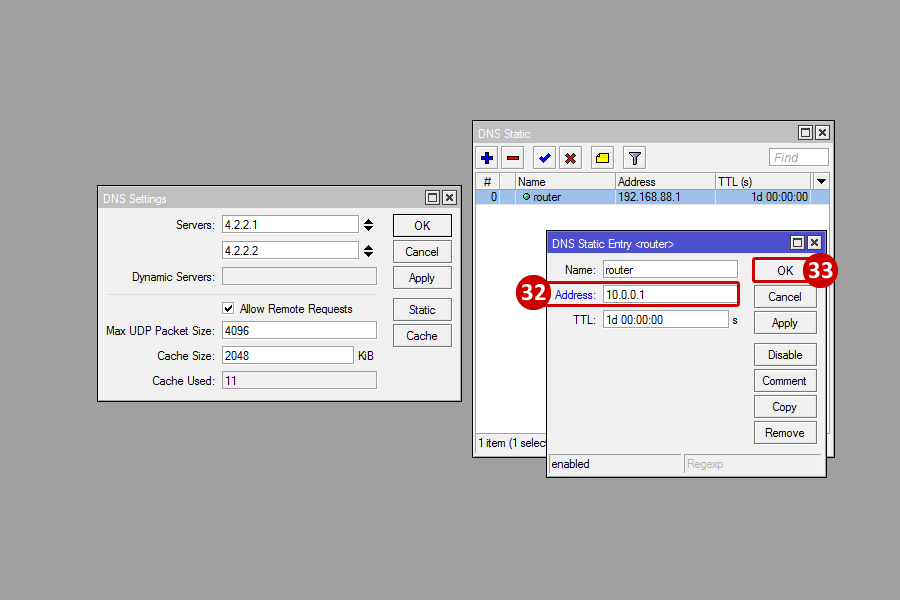
- Change the address to the new Gateway IP (e.g.: 10.0.0.1)
- Click OK
- The new Address will now appear in the DNS Static list

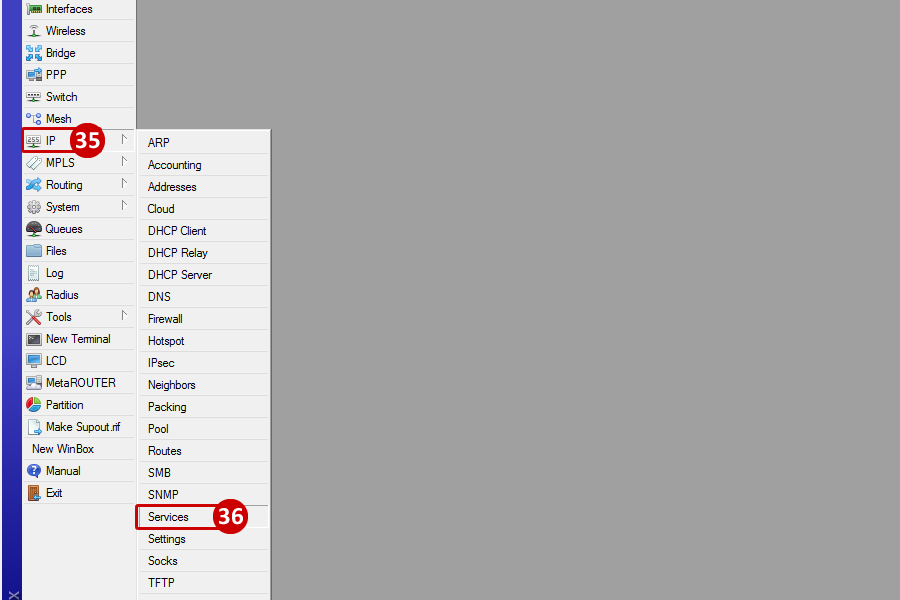
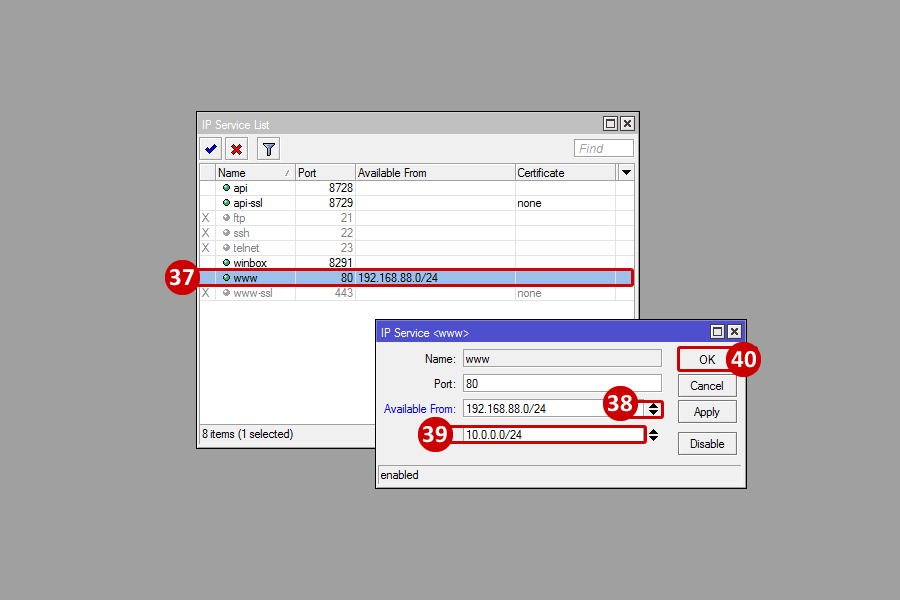
Add the New Available From Address
- Go to IP
- Go to Services
- From the IP Service List window, select the "www" entry by double clicking the entry
- Click on the arrows to add a new entry
- Enter the new subnet (e.g.: 10.0.0.0/24)
- Click OK
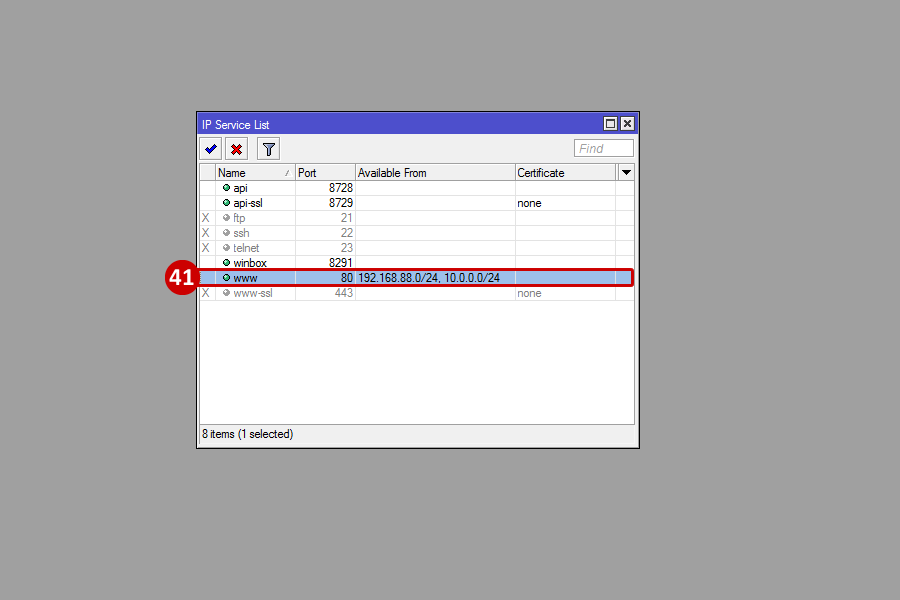
- The new Available From subnet will now appear on the IP Service List for the www service.
| 