|
**Disclaimer: This guide is provided by 3NG as a courtesy to its partners. You are using this guide at your own risk and 3NG is NOT responsible or liable for any issues that may occur from the use of this guide or a Mikrotik device.
While we recommend Mikrotik products because of their reliability and VoIP friendliness, we are NOT Mikrotik distributors or authorized support vendors, nor do we manage or support any Mikrotik devices on anyone’s behalf.
We recommend that you are always up to date with any information related to the products that you sell, install and or support, and signup for any news or product notices that your hardware distributor or manufacture may offer.**
Getting Started
This guide will help you perform a simple but complete configuration on a Mikrotik router.
If using a pre-configured router you should perform a factory reset and upgrade the firmware before starting.
How to Factory Reset a Mikrotik: https://wiki.mikrotik.com/wiki/Manual:Reset
Download and Upgrade Mikrotik Firmware: https://mikrotik.com/download
Steps Outlined
The following steps are covered in this guide. If a step or feature is not needed you can skip it. Steps with a (*) are highly recommended.
*Note: After you have setup your Mikrotik router see this guide for instructions on how to configure QoS (Quality of Service)
Instructions
To access the mikrotik, please change your network settings to be able to access 192.168.88.1 which is the default IP address of the Mikrotik.
Once the network settings have been updated, please connect to ETH2 or port 2 to access the LAN connection. Please note that ETH1 or port 1 is for the WAN connection.
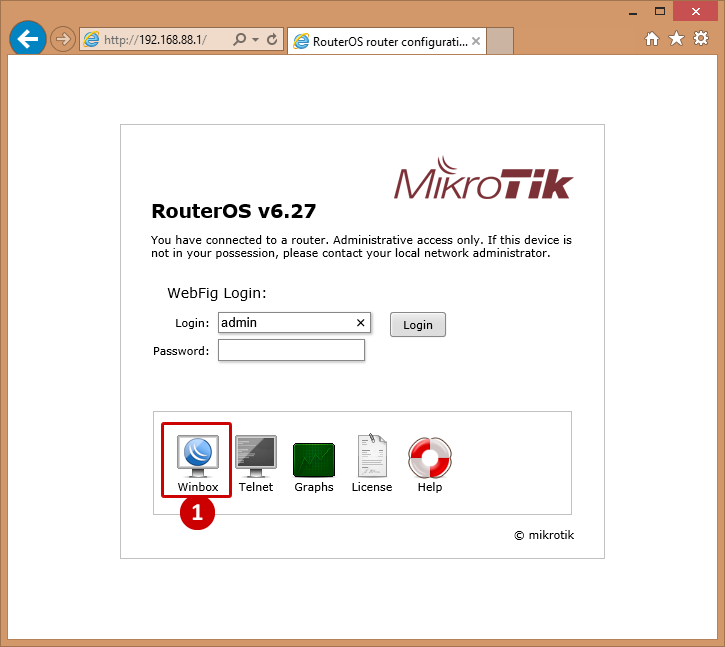
With the network settings able to access 192.168.88.1 and your computer or laptop is connected to eth2, please open a web browser and enter in 192.168.88.1 in the address bar.
You will now have the web login screen available. Here will want to download Winbox, which is the tool we will be using to manage the Mikrotik.
- From the Mikrotik login webpage, click on Winbox to download the Winbox application.
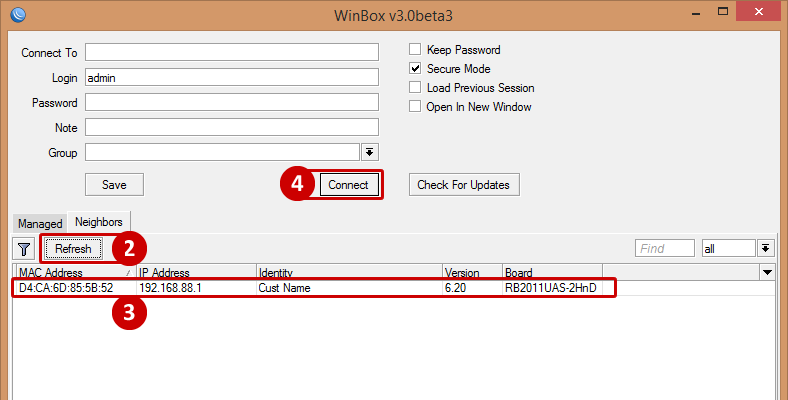
- Once Winbox has been downloaded, open the application and it will find the Mikrotik, if not press Refresh to find the Mikrotik.
- The Mikrotik will display the Mikrotik with the MAC Address, IP Address, Identity, Version, and the Board.
- By default the Login is admin and there is no password. Press Connect to connect to the Mikrotik.
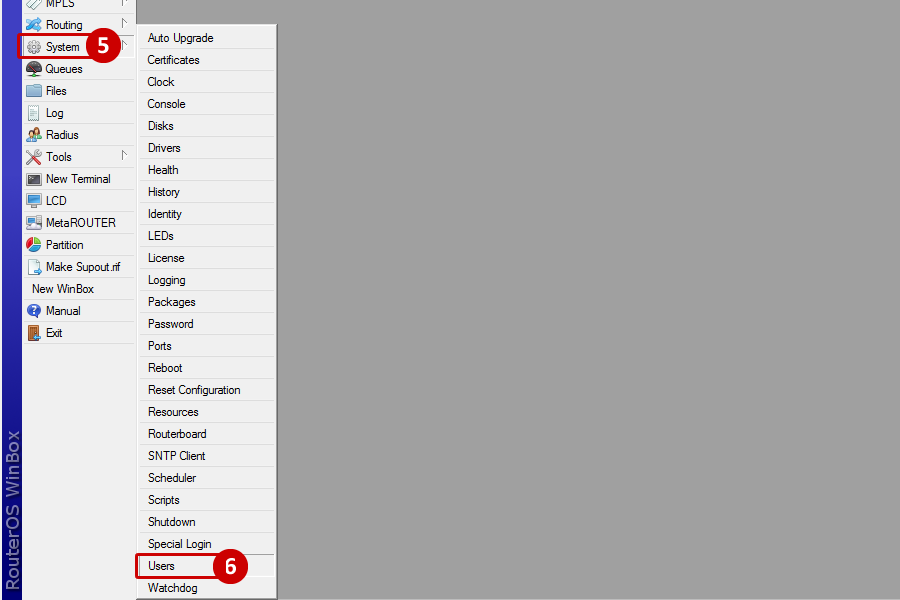
Set Password for Admin Account
- Go to System
- Go to Users
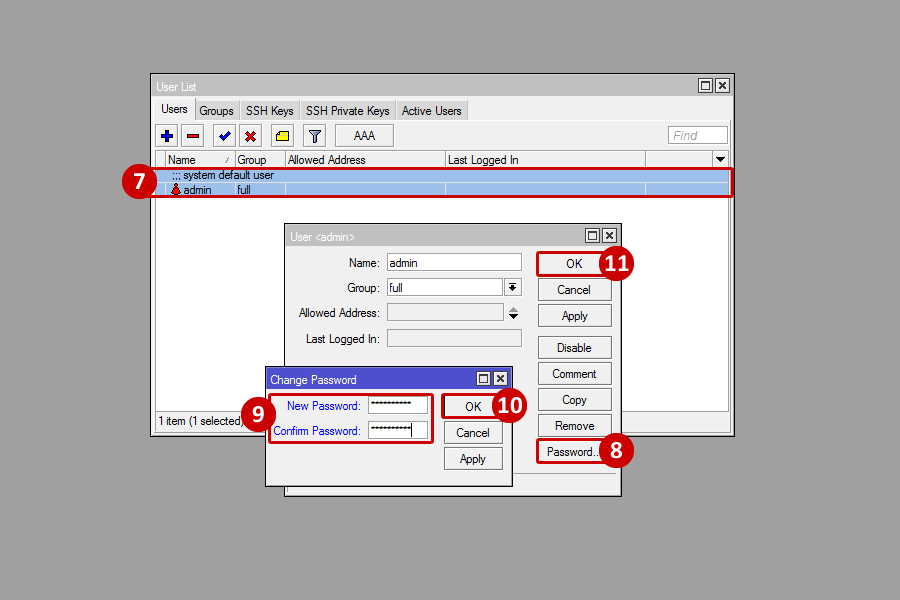
- From the User List, select the admin account by double clicking the account
- From the User <admin> window, click on Password
- From the Change Password window, enter in the desired password and re-enter to confirm
- Click OK from the Change Password window
- Click OK from the User <admin> window
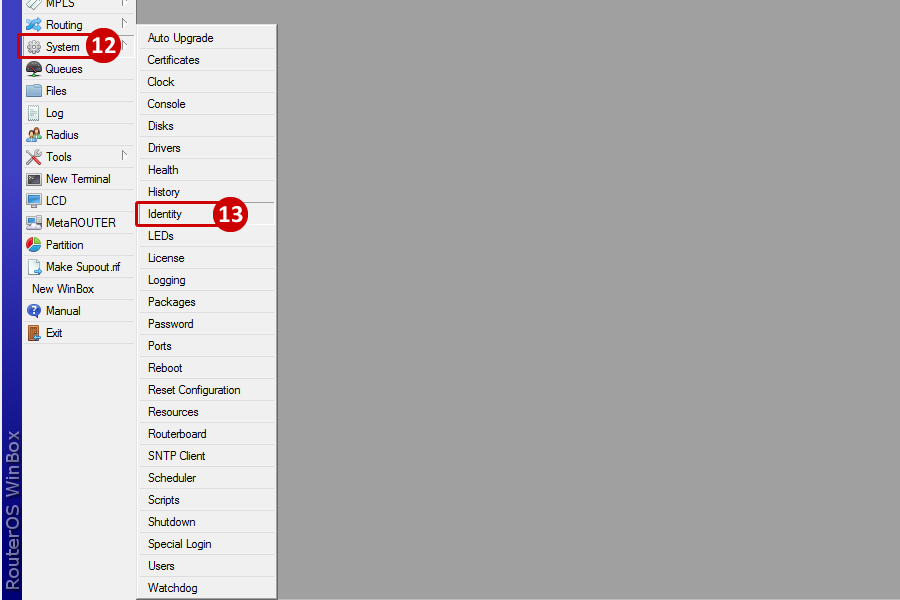
Set Identity
- Go to System
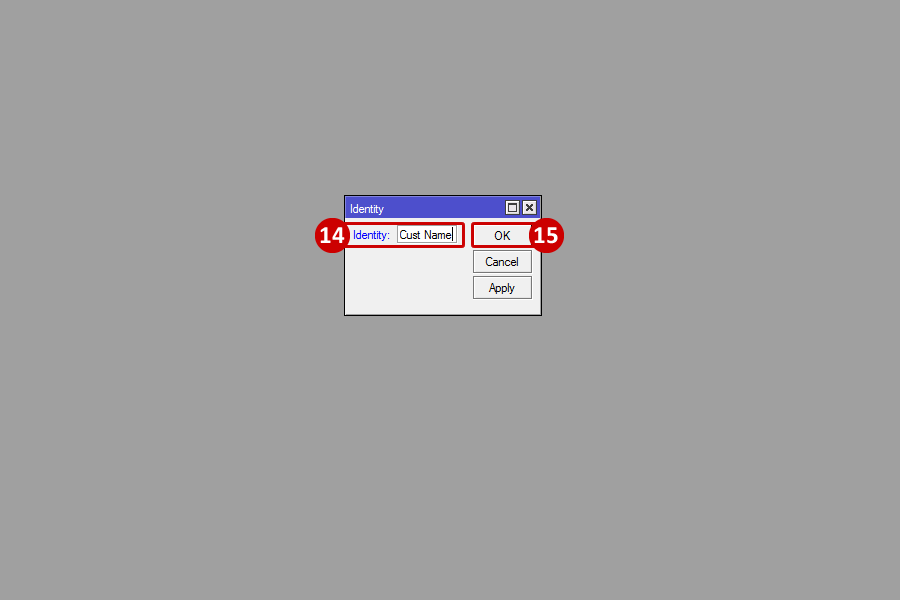
- Go to Identity
- In the Identity window, enter in an identity to identifty the given Mikrotik (i.e.: Cust Name)
- Click OK
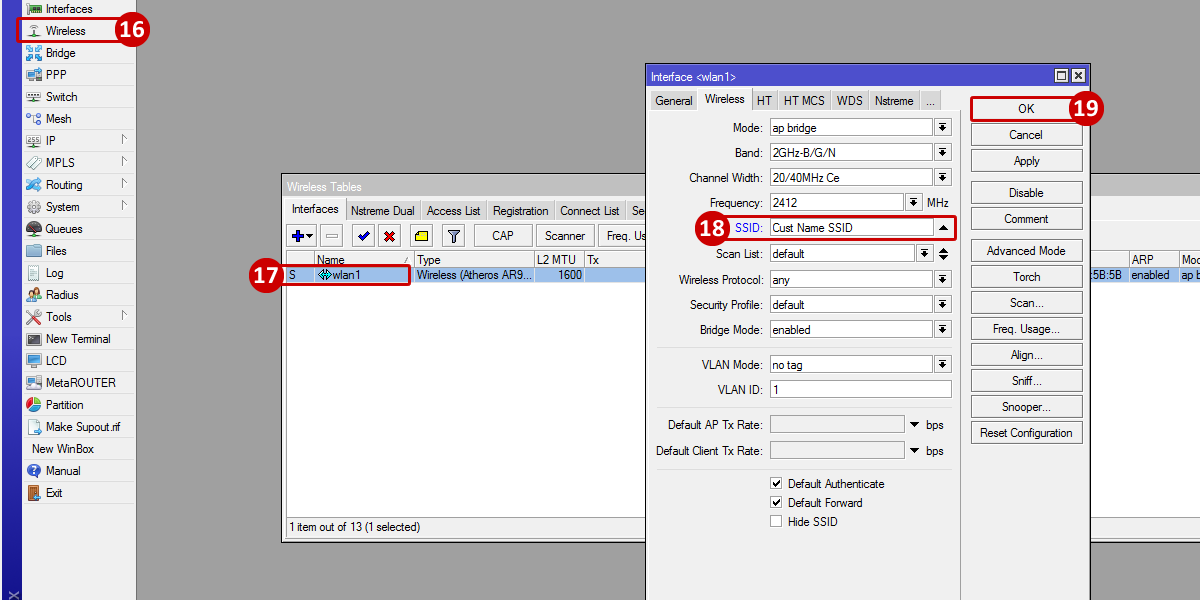
Set an SSID
- Go to Wireless
- From the Wireless Tables select wlan1 by double clicking the wlan1 interface
- From the Interface <wlan1> window, find SSID and enter in the desired SSID
- Click OK
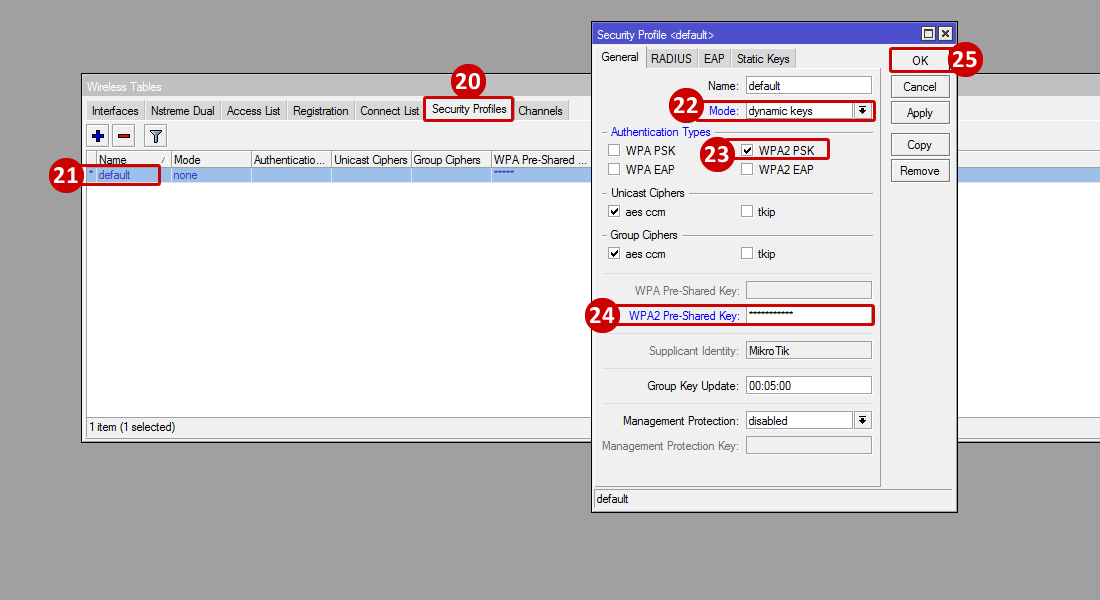
Set a Wireless Key
- From the Wireless Tables window, go to the Security Profiles tab
- From the list, find the default Security Profile and double clicking the default profile
- From the Security Profile <default> window, Change the Mode to "dynamic keys"
- From the Authentication Type, select WPA2 PSK by checking the box
- In the WPA2 Pre-Shared Key, enter in the desired wireless key (if the key is too short, the WPA2 Pre-Shared Key text will be red. If acceptable, it will be blue)
- Click OK
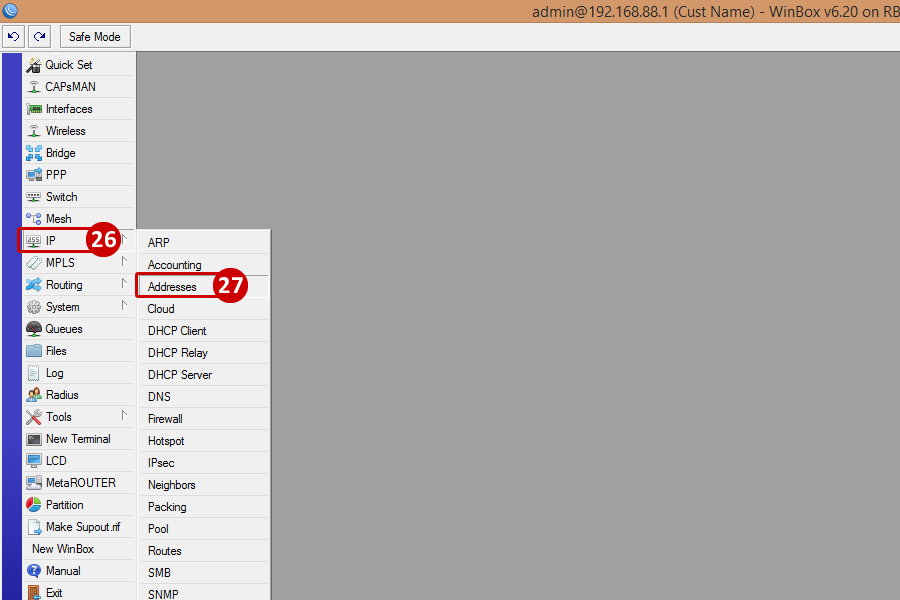
Add a static WAN IP
- Go to IP
- Go to Addresses
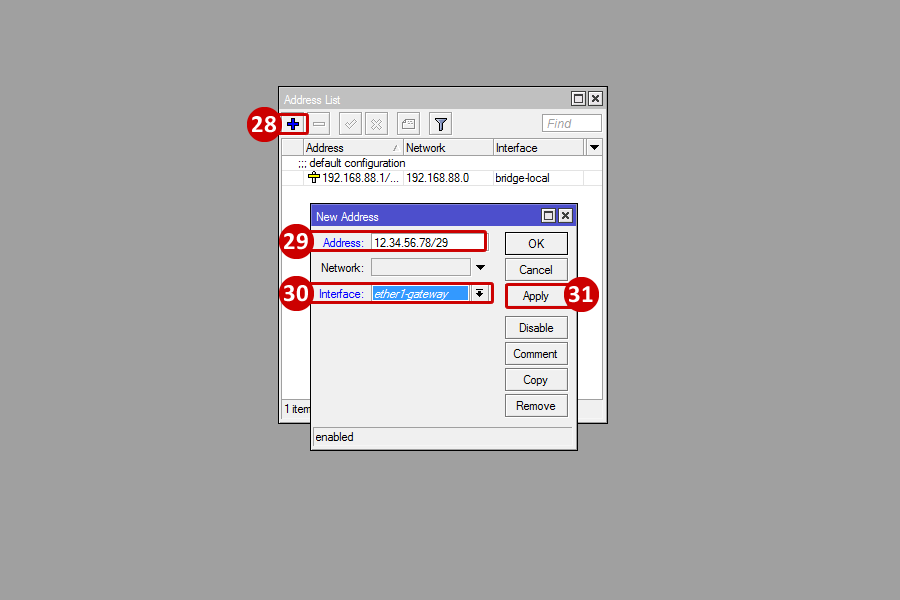
- From the Address List window, click the blue Plus Sign
- From the New Address window, enter in the WAN IP that will be used which is provided by the ISP (i.e.: 12.34.56.78/29)
- Select the Interface and set to ether1-gateway
- Click Apply
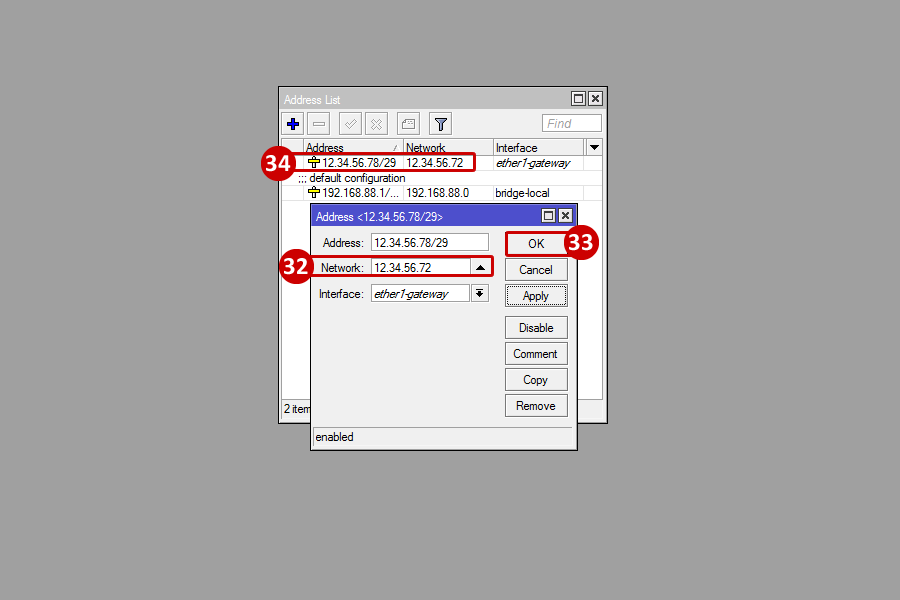
- The Network feild will auto populate with the network address
- Click OK
- Note that the WAN IP now appears on the Address List window
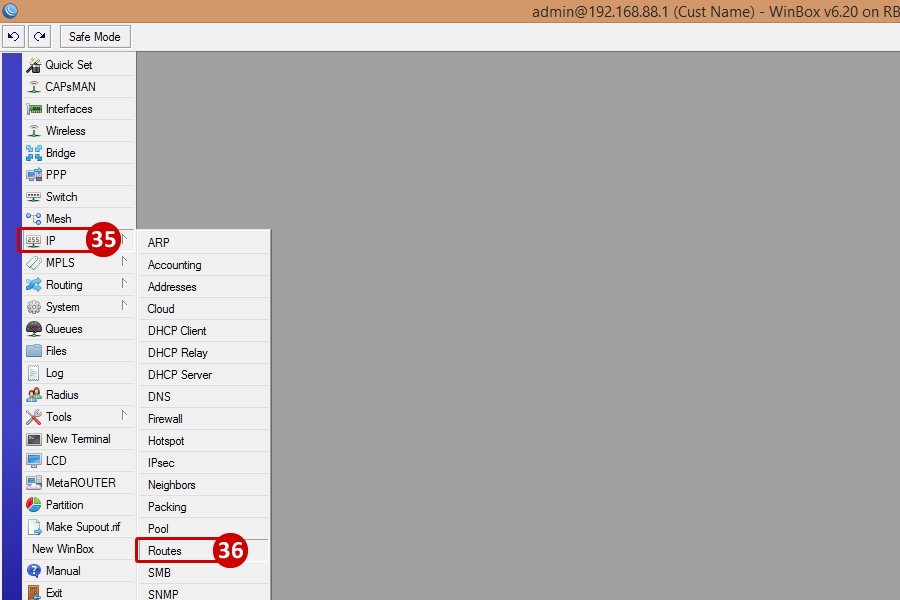
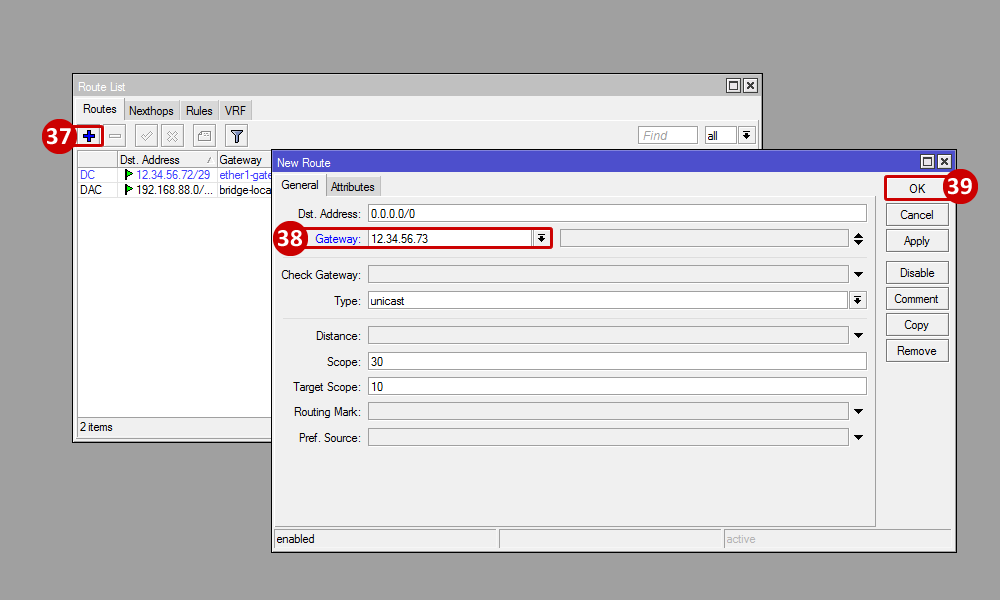
Add a Gateway for WAN IP
- Go to IP
- Go to Routes
- From the Route List window click the blue Plus Sign
- From the New Route window, enter in the Gateway that was provided by the ISP (i.e.: 12.34.56.73)
- Click OK
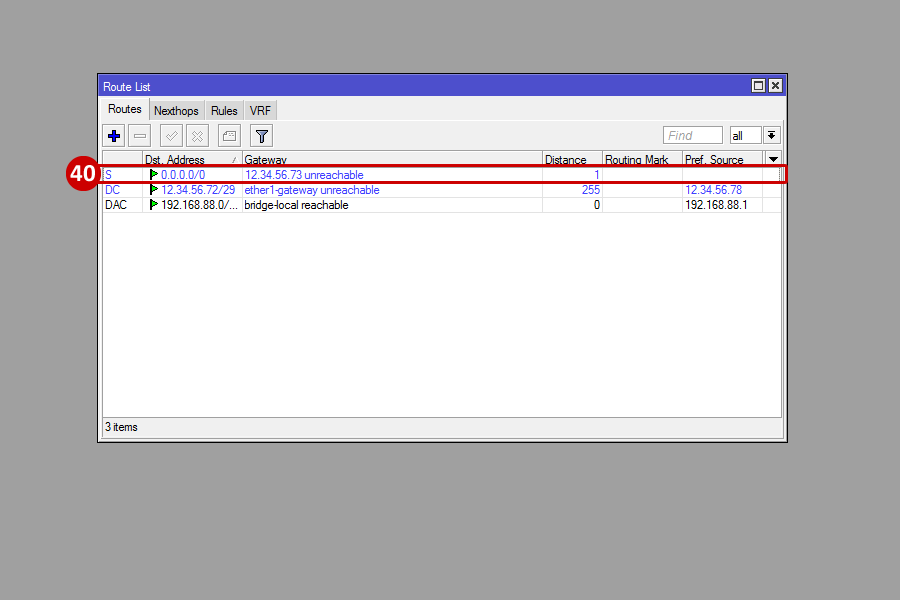
- Note that the Gateway is now appears on the Route List window (when ETH1 is connected to the WAN connection, the ISP's bridged modem, the status should be reachable)
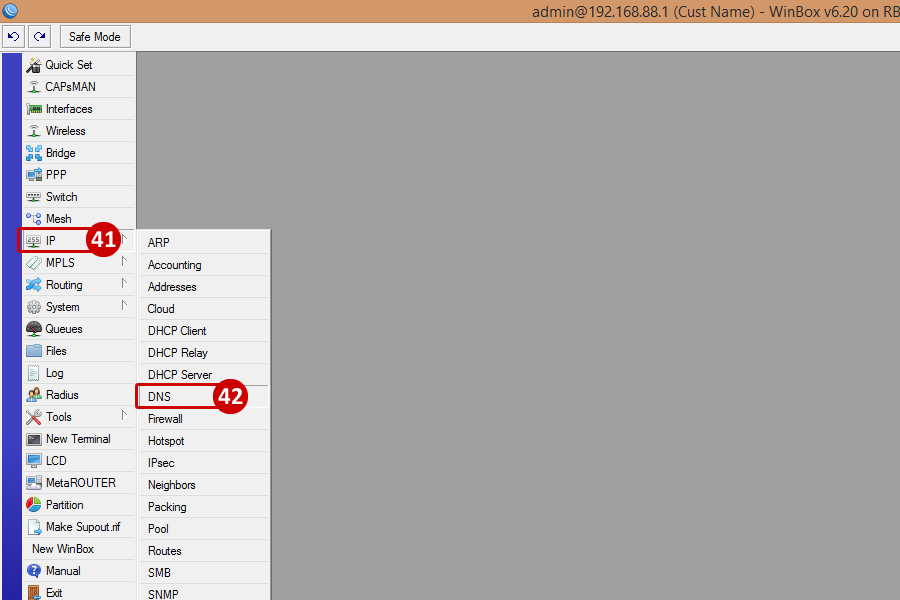
Add DNS servers
- Go to IP
- Go to DNS
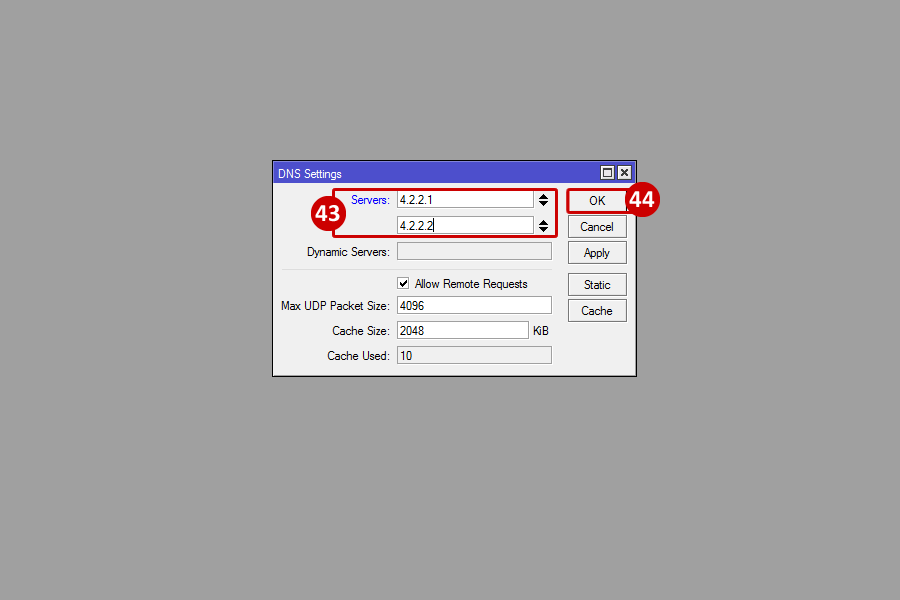
- From the DNS Settings window, enter in the DNS server addresses provided by the ISP; click on the arrows to add a second server address (i.e.: 1.1.1.1, 4.2.2.2)
- Press OK
Add Firewall Rule for Winbox
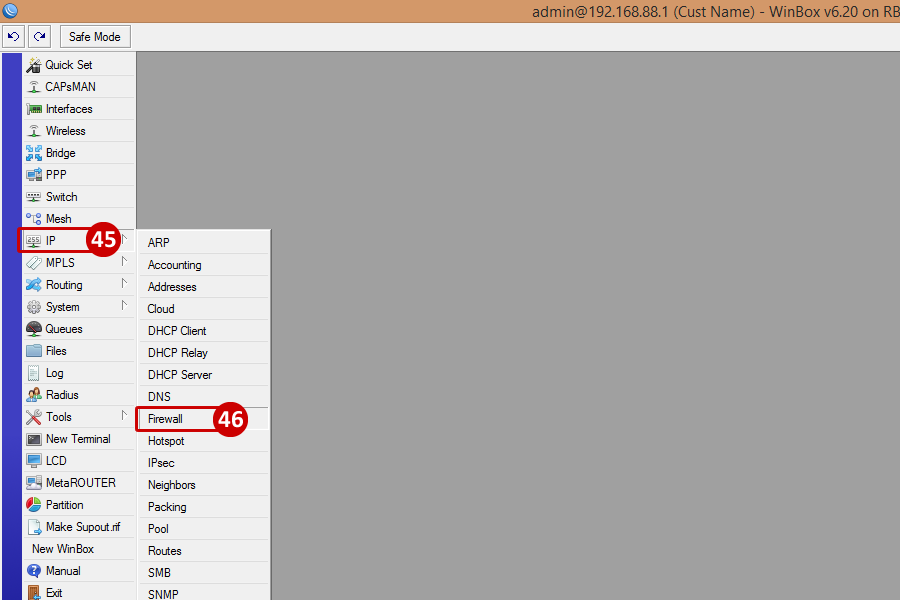
- Go to IP
- Go to Firewall
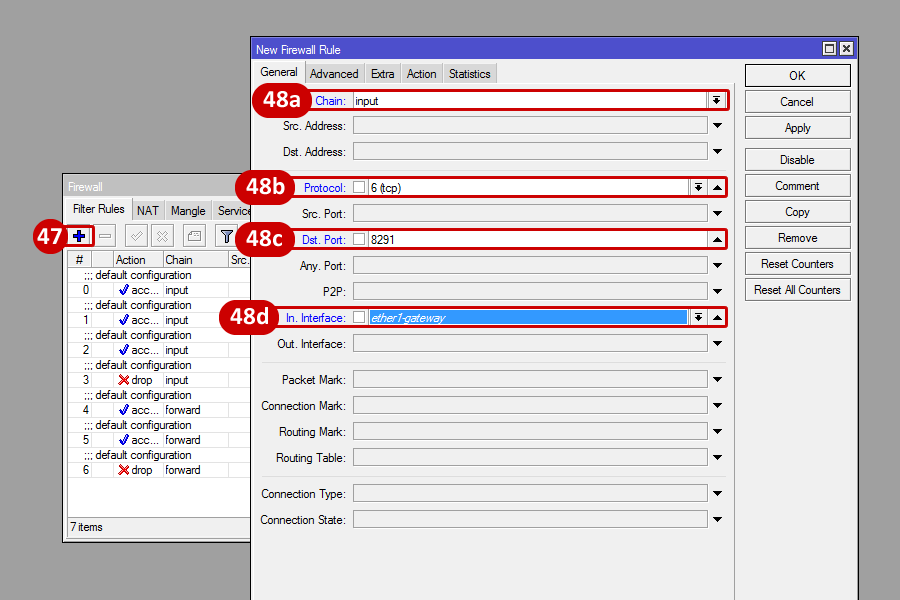
- From the Firewall window, click the blue Plus Sign
- From the New Firewall Rule, do the following:
- Select Chain, and set to input
- Select Protocol, and set to tcp
- Enter in the Dst. Port to 8291
- Select the In. Interface, and set to ether1-gateway
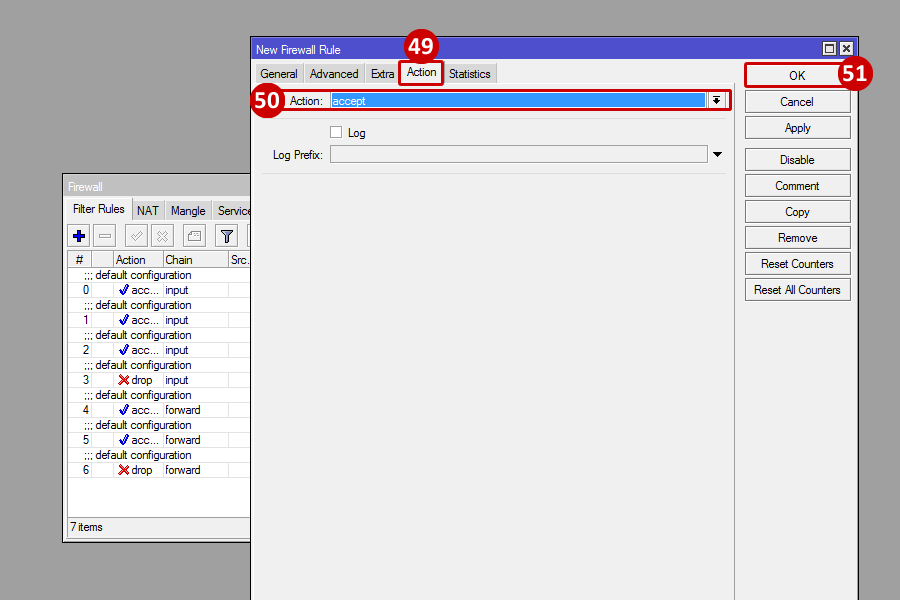
- Go to the Action tab
- Select Action, and set to accept
- Click OK
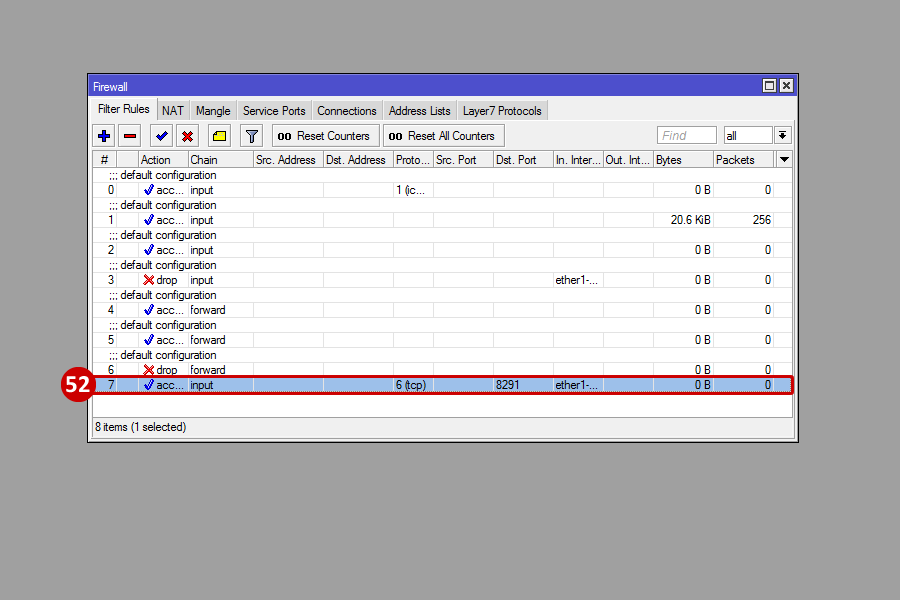
- Select the new rule which is now seen on the Filter Rules list
- Drap the new rule to the top
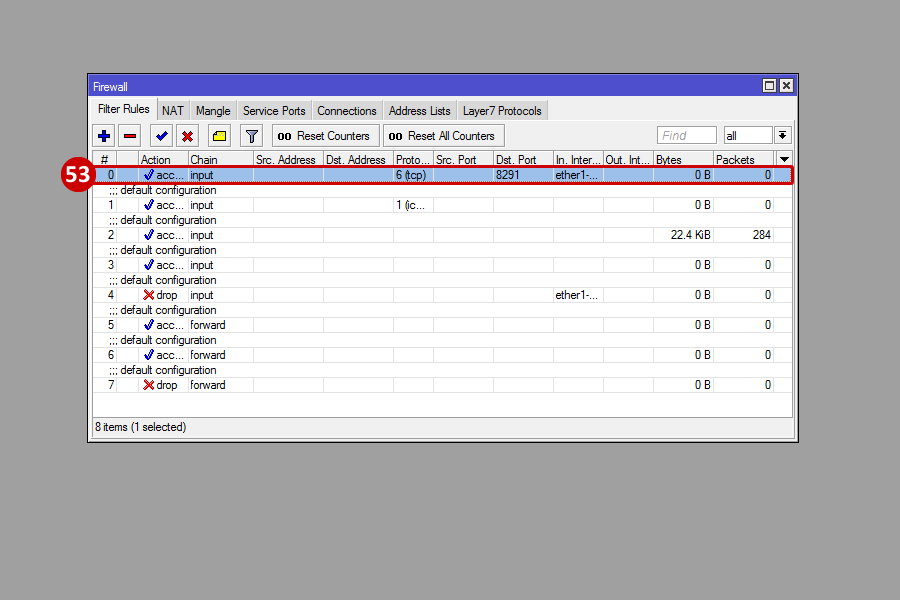
Add Firewall Rule for DNS DoS Attack
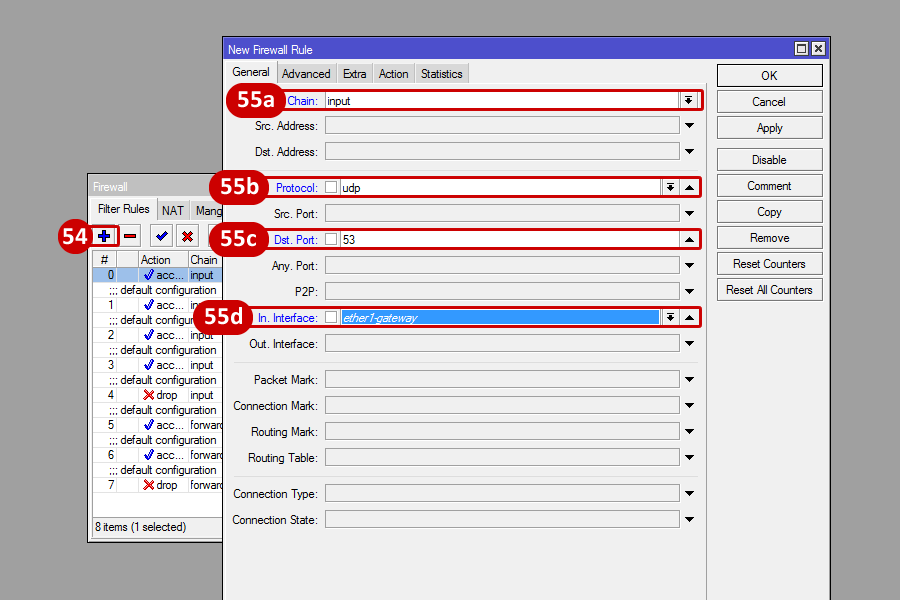
- From the Firewall window, click the blue Plus Sign
- From the New Firewall Rule, do the following:
- Select Chain, and set to input
- Select Protocol, and set to udp
- Enter in the Dst. Port to 53
- Select the In. Interface, and set to ether1-gateway
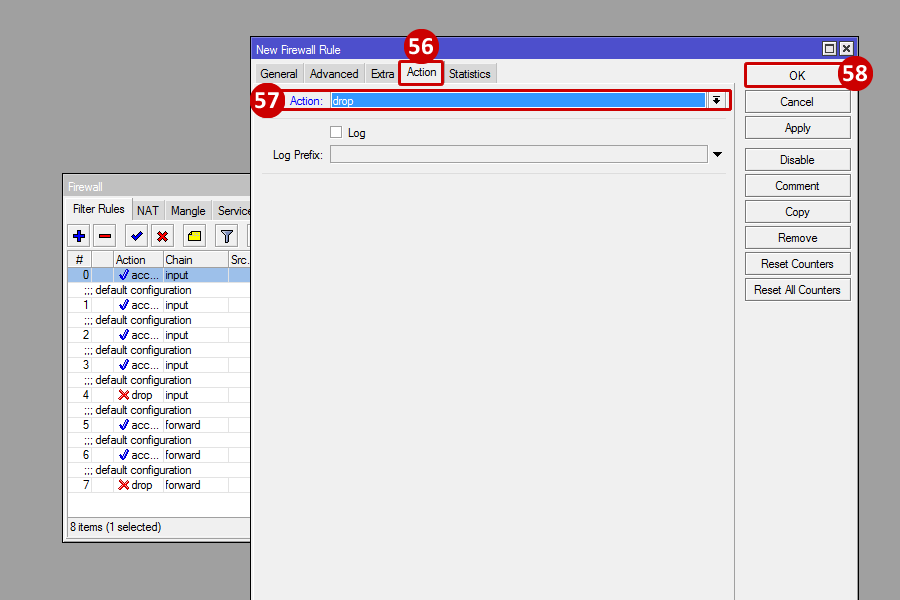
- Go to the Action tab
- Select Action, and set to drop
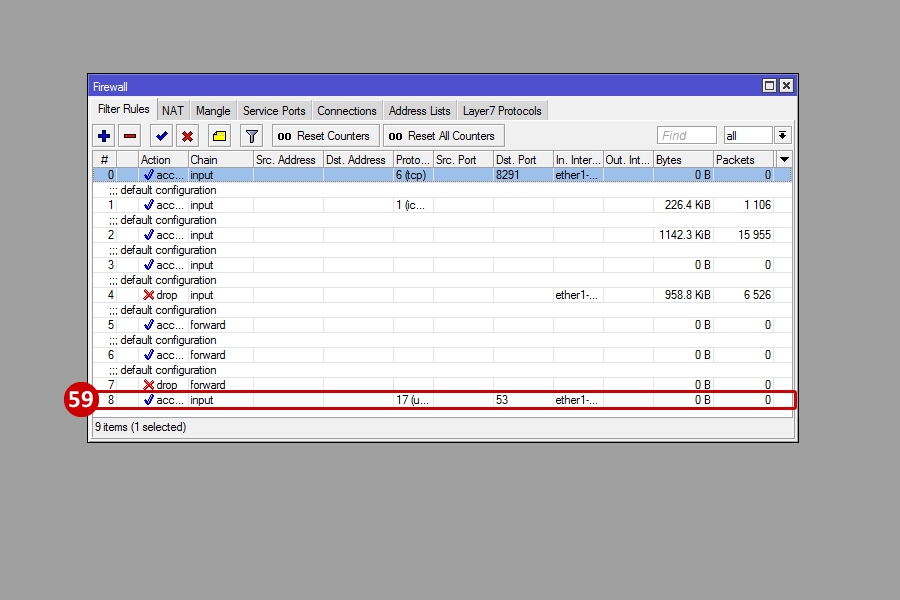
- Click OK
- The new rule is now seen on the Filters Rule list
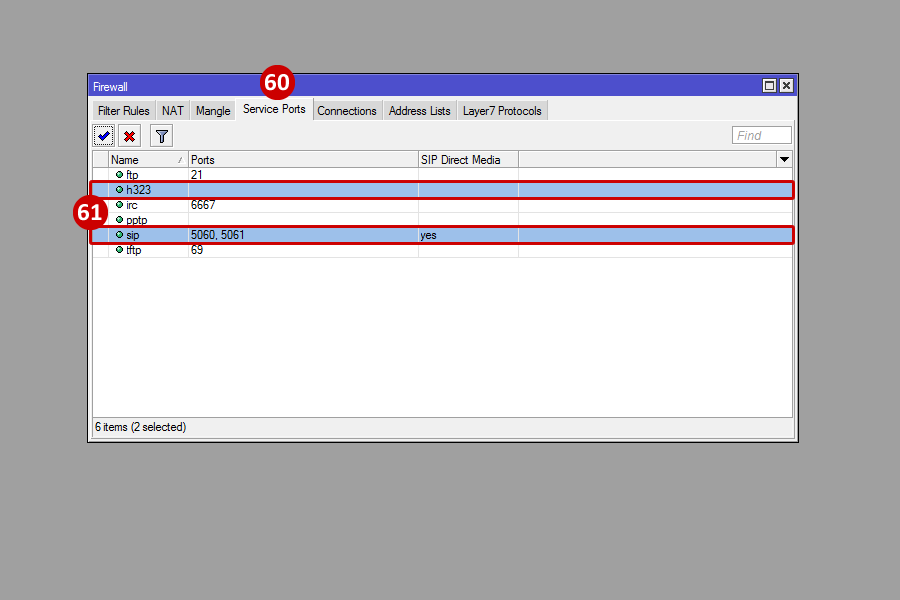
Disable SIP (SIP ALG)
- From the Firewall window, click on the Service Ports tab
- Select h323 and SIP (use Ctrl to select both)
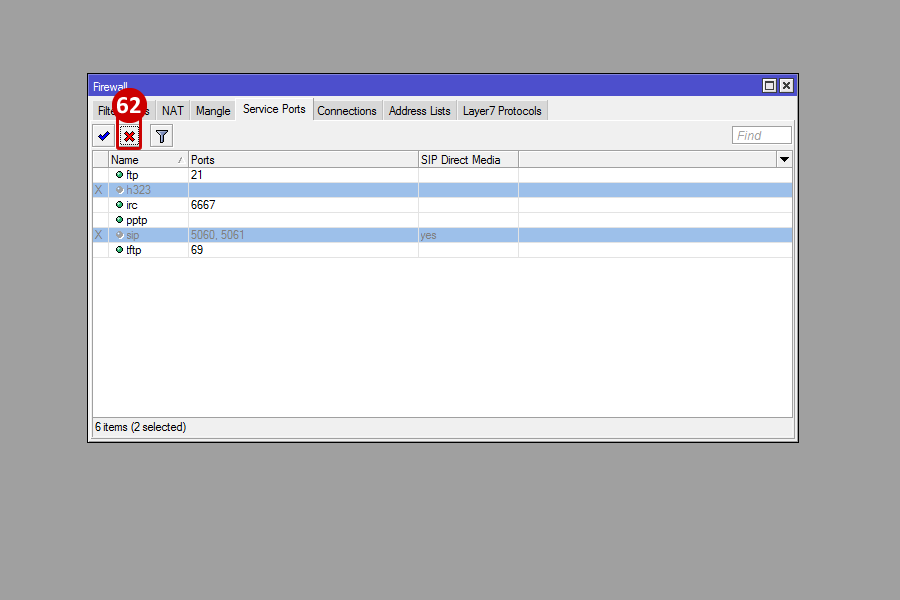
- Hit "d" on your keyboard or click the red "x" to disable, both h323 and sip now appear grayed out which means they are now disabled
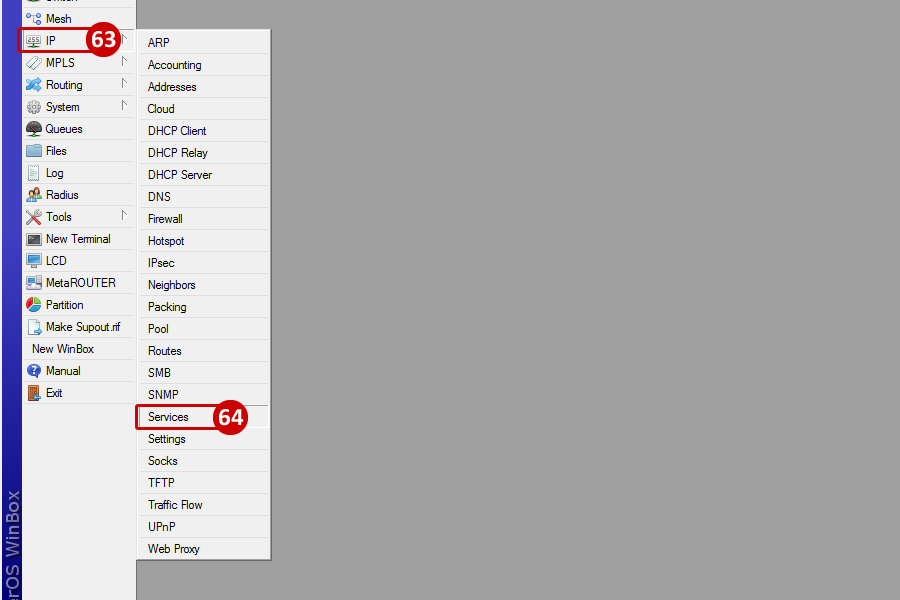
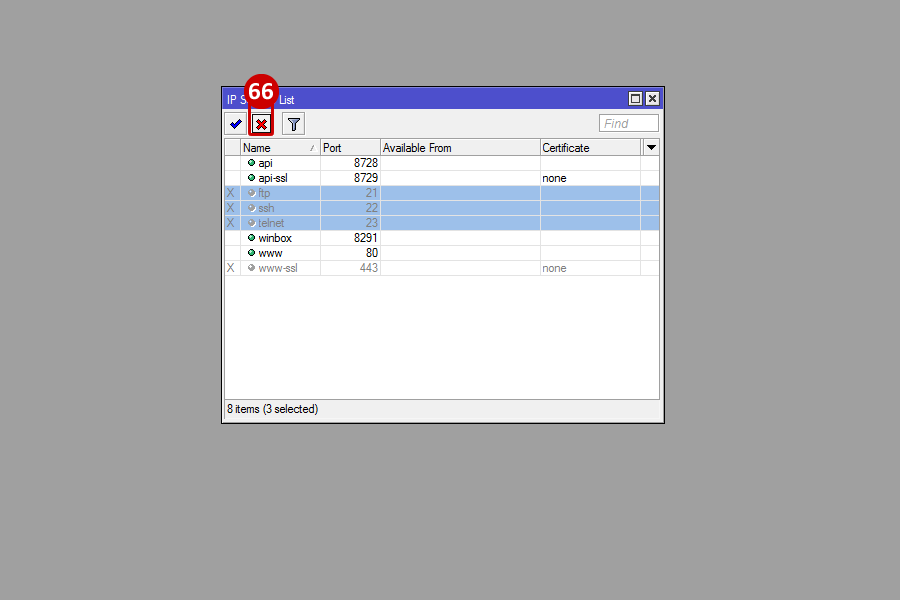
Disable IP Services
- Go to IP
- Go to Services
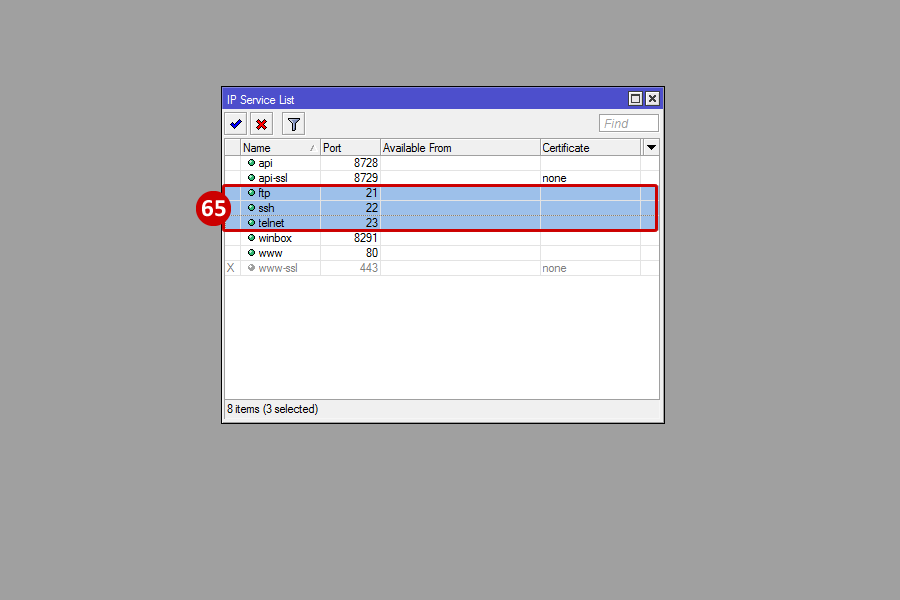
- Select the following Services from the Service List; ftp, ssh, and telnet
- Hit "d" on your keyboard or click the red "x" to disable the services selected, they will now appear grayed out which means they have been disabled
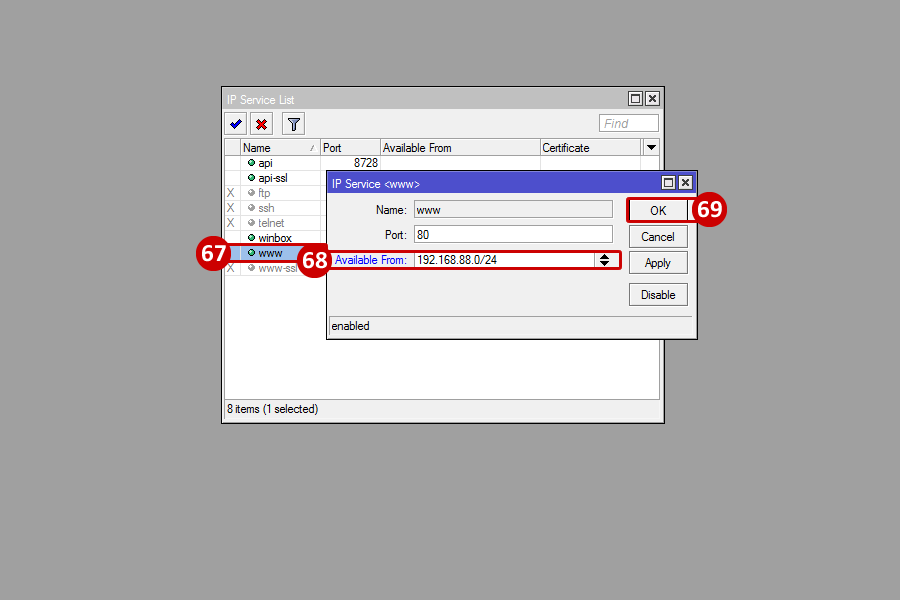
Add an Available from Address
- From the IP Services List, double click on "www" to edit the service
- In the IP Service <www> window, type in the local LAN subnet (i.e.: 192.168.88.0/24)
- Click OK
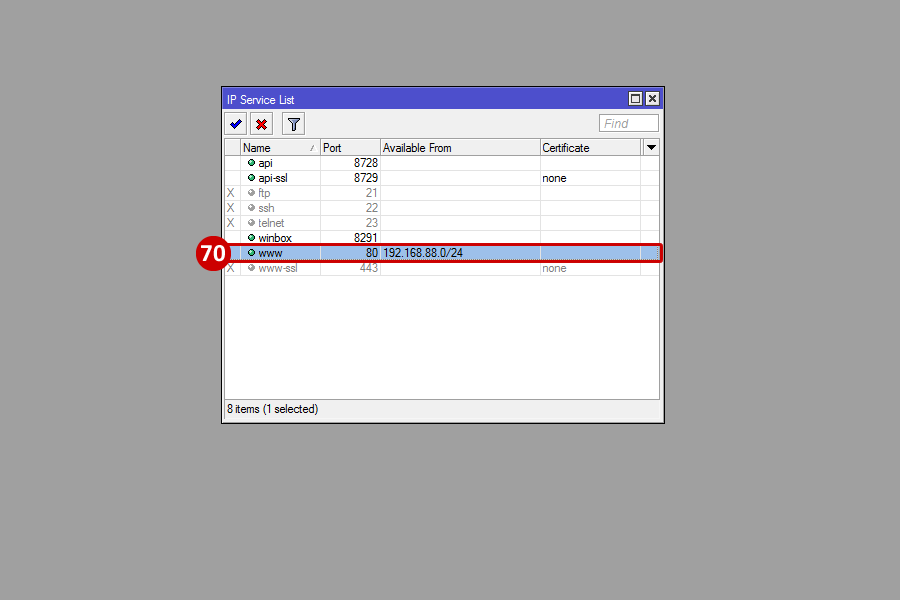
- The available from address now appears with the LAN subnet.
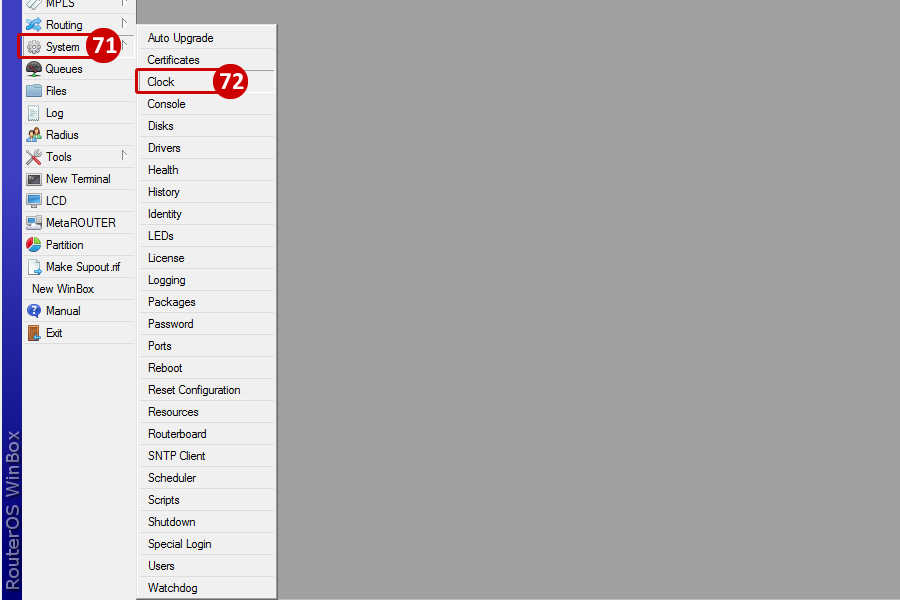
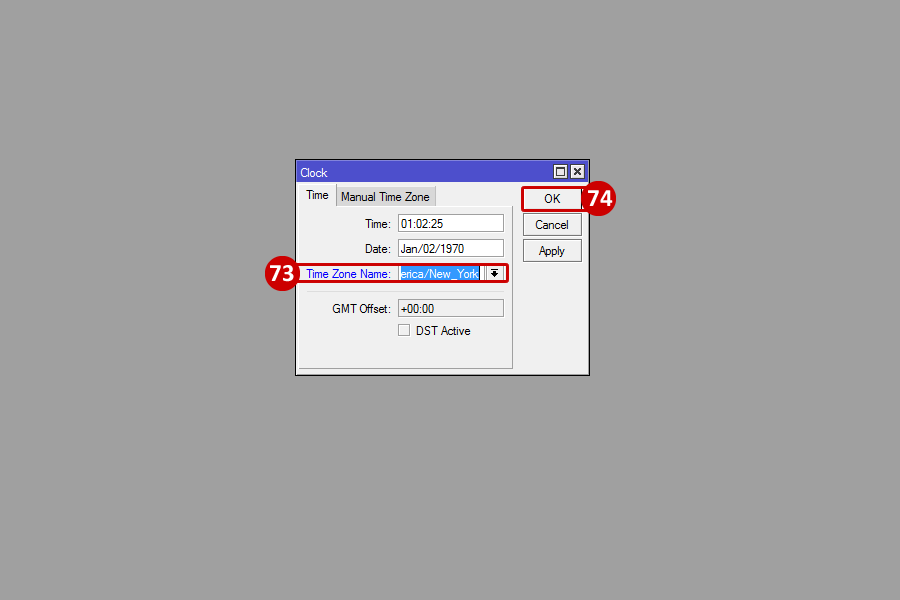
Set Clock
- Go to System
- Go to Clock
- From the Time Zone Name drop down menu, select the Time Zone for the device
- Click OK
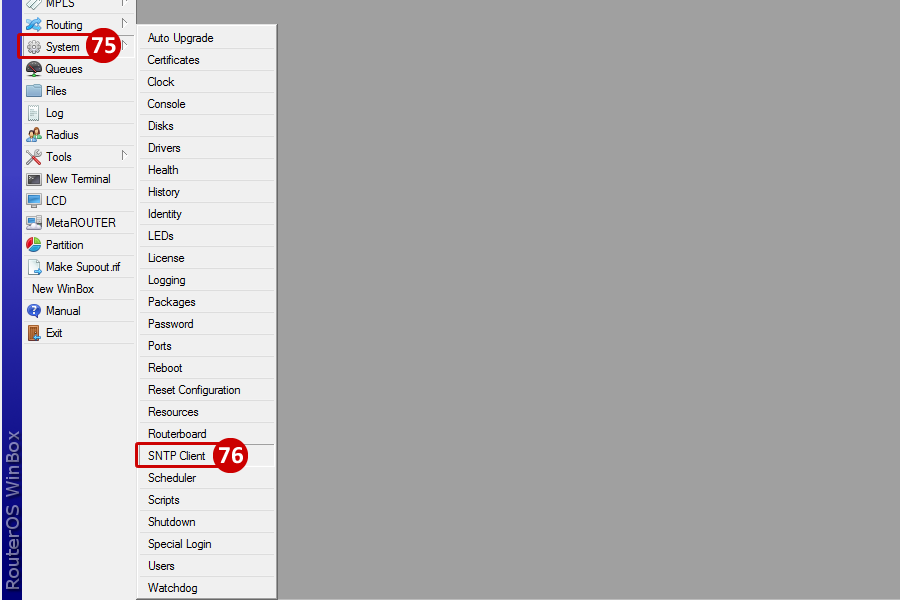
Set SNTP
- Go to System
- Go to SNTP Client
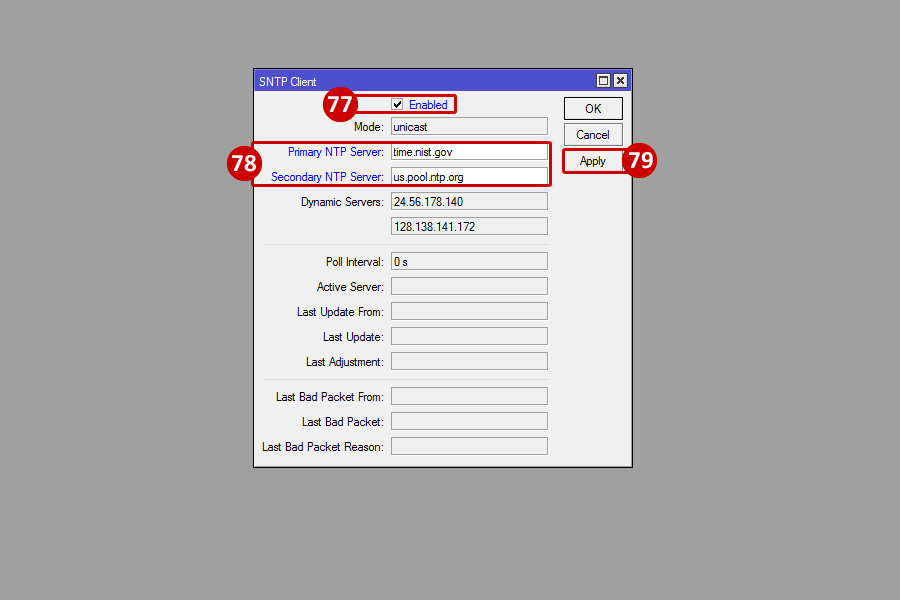
- Check the box for Enable
- In the Primary NTP server field enter in: time.nist.gov In the Secondary NTP server field enter in: us.pool.ntp.org
- Click Apply.
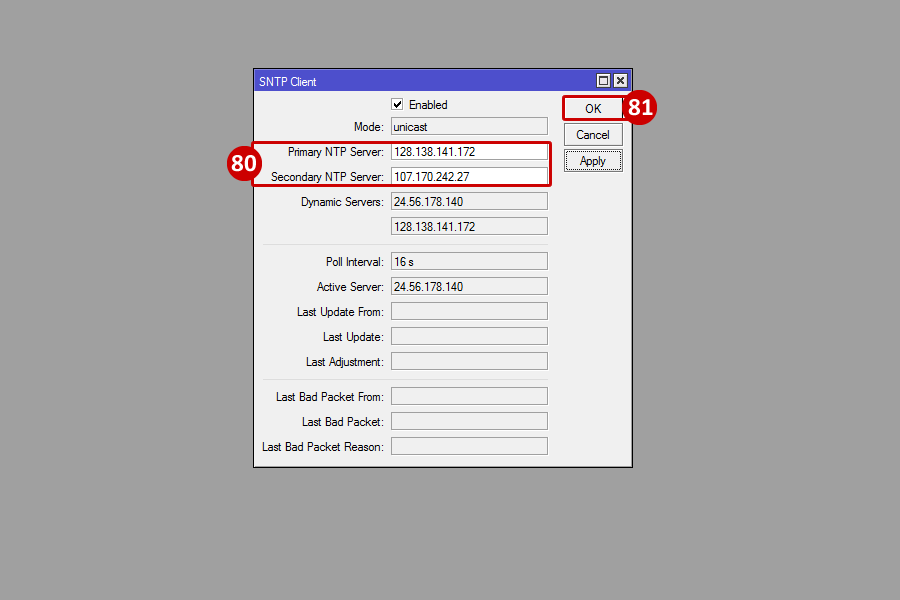
- If DNS was set, the server addresses will be changed to IPs (NTP Server text will be blue, if DNS is not set NTP Server address will be red)
- Click OK
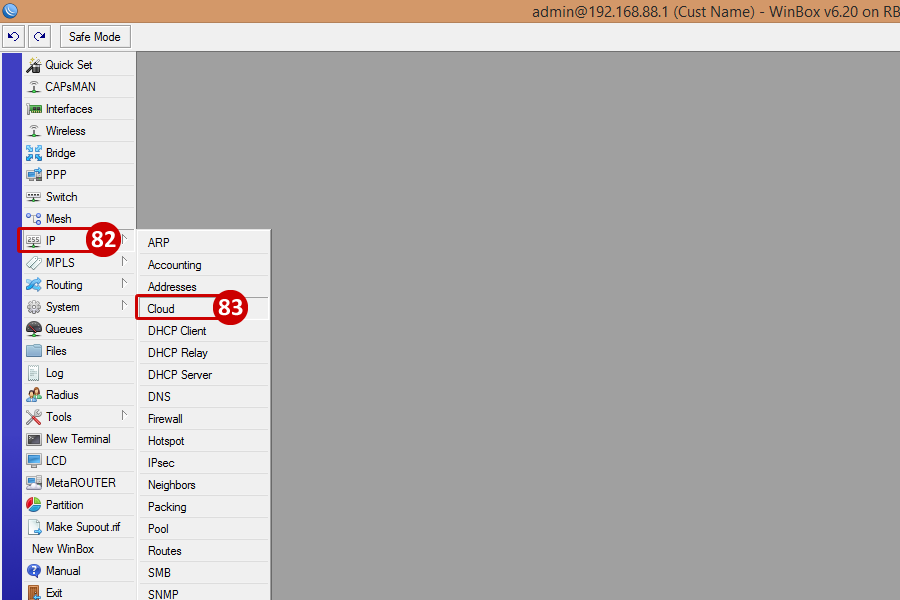
Enable Cloud Feature
- Go to IP
- Go to Cloud
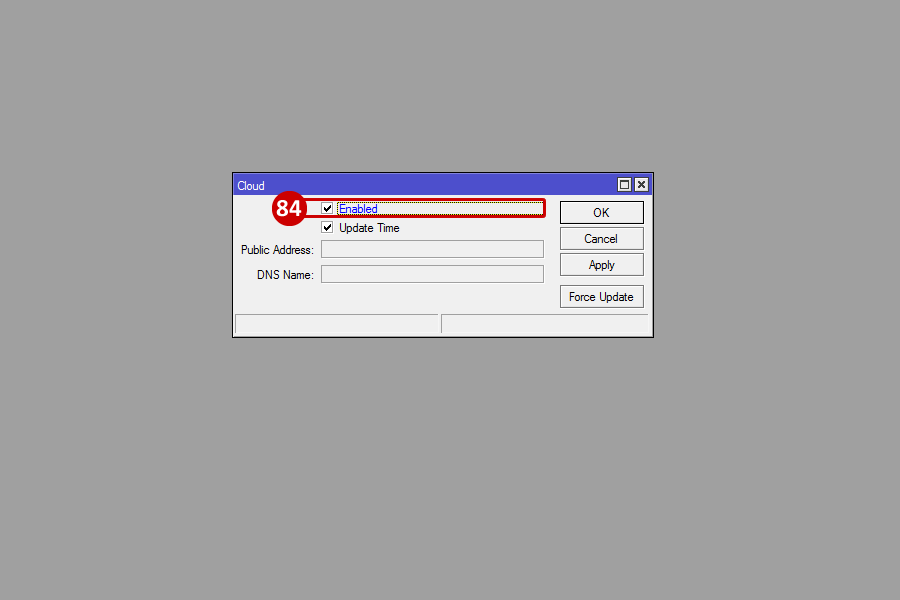
- Check the box for Enable
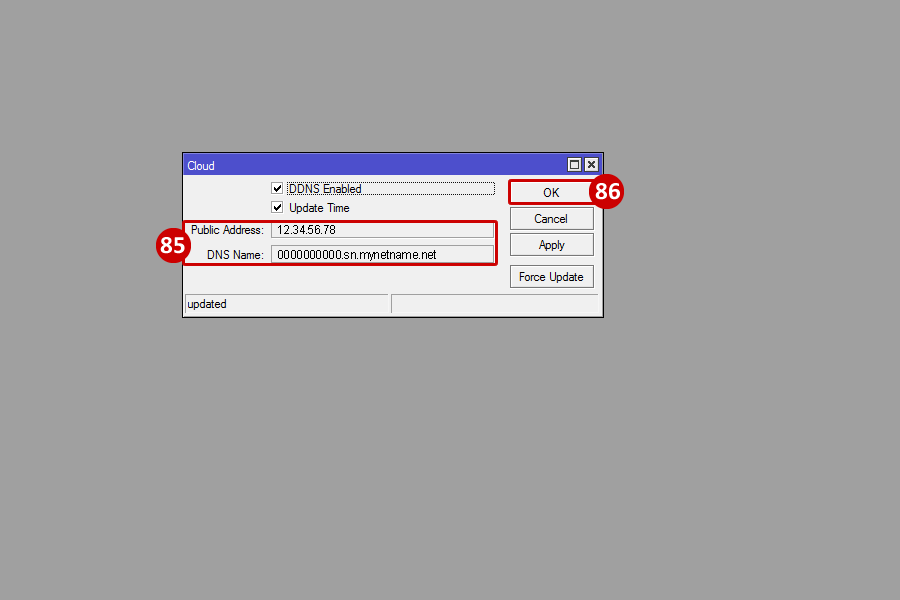
- If the Mikrotik is connected to the internet, the Public Address and DNS Name will become populated (use the DNS Name to log in remotely regardless of the IP address)
- Click OK
|
