|
Yeastar MyPBX Configuration Guide
Posted by , Last modified by Albert Diaz on 27 August 2018 02:13 PM
|
|
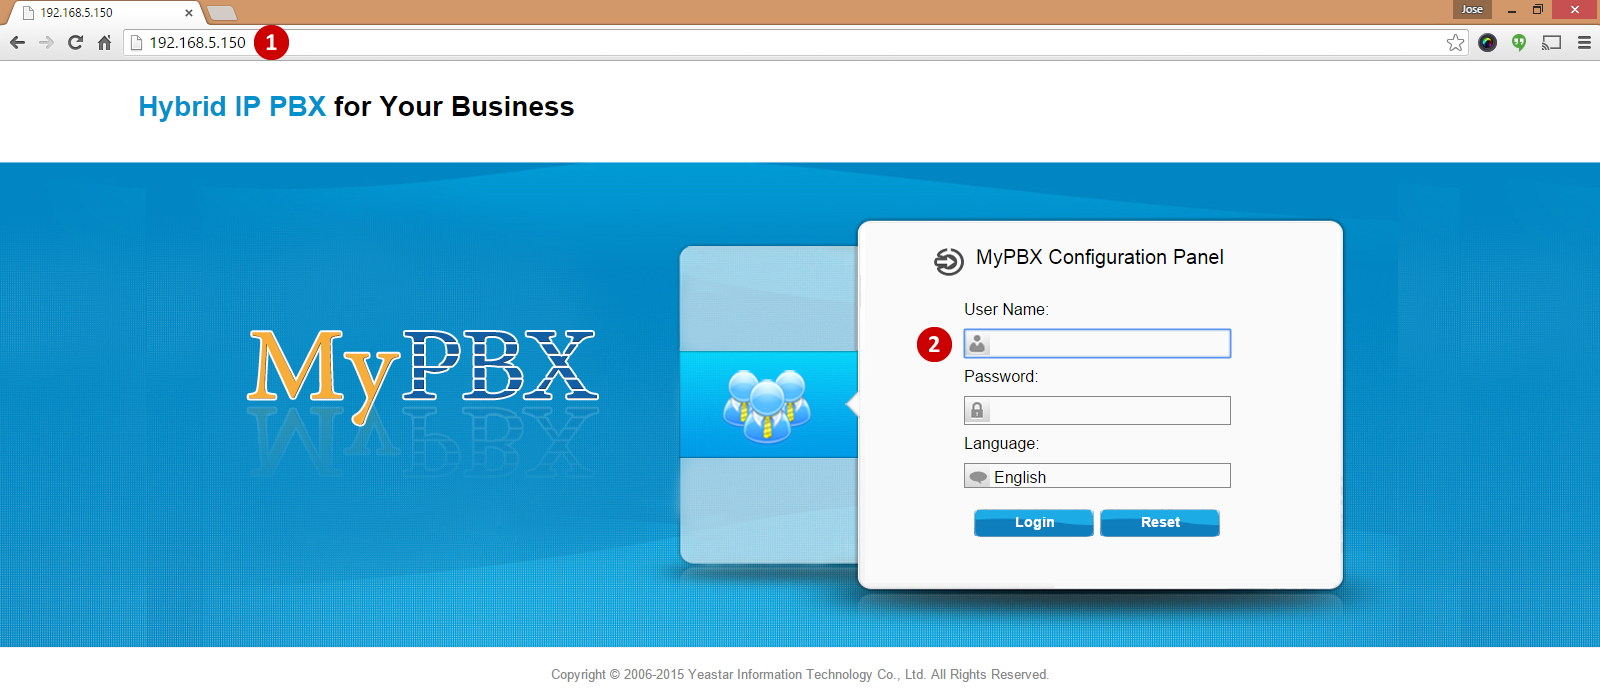
To access the Yeastar MyPBX's web GUI, please change network settings to be on the 192.168.5.X subnet.
Logging In & Changing Password
- From a web browser go to 192.168.5.150
- Log in using the default
- User Name: admin
- Password: password
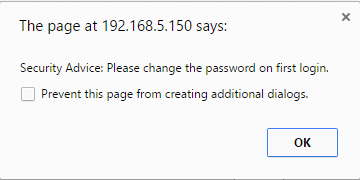
- The system will advise to change the default password
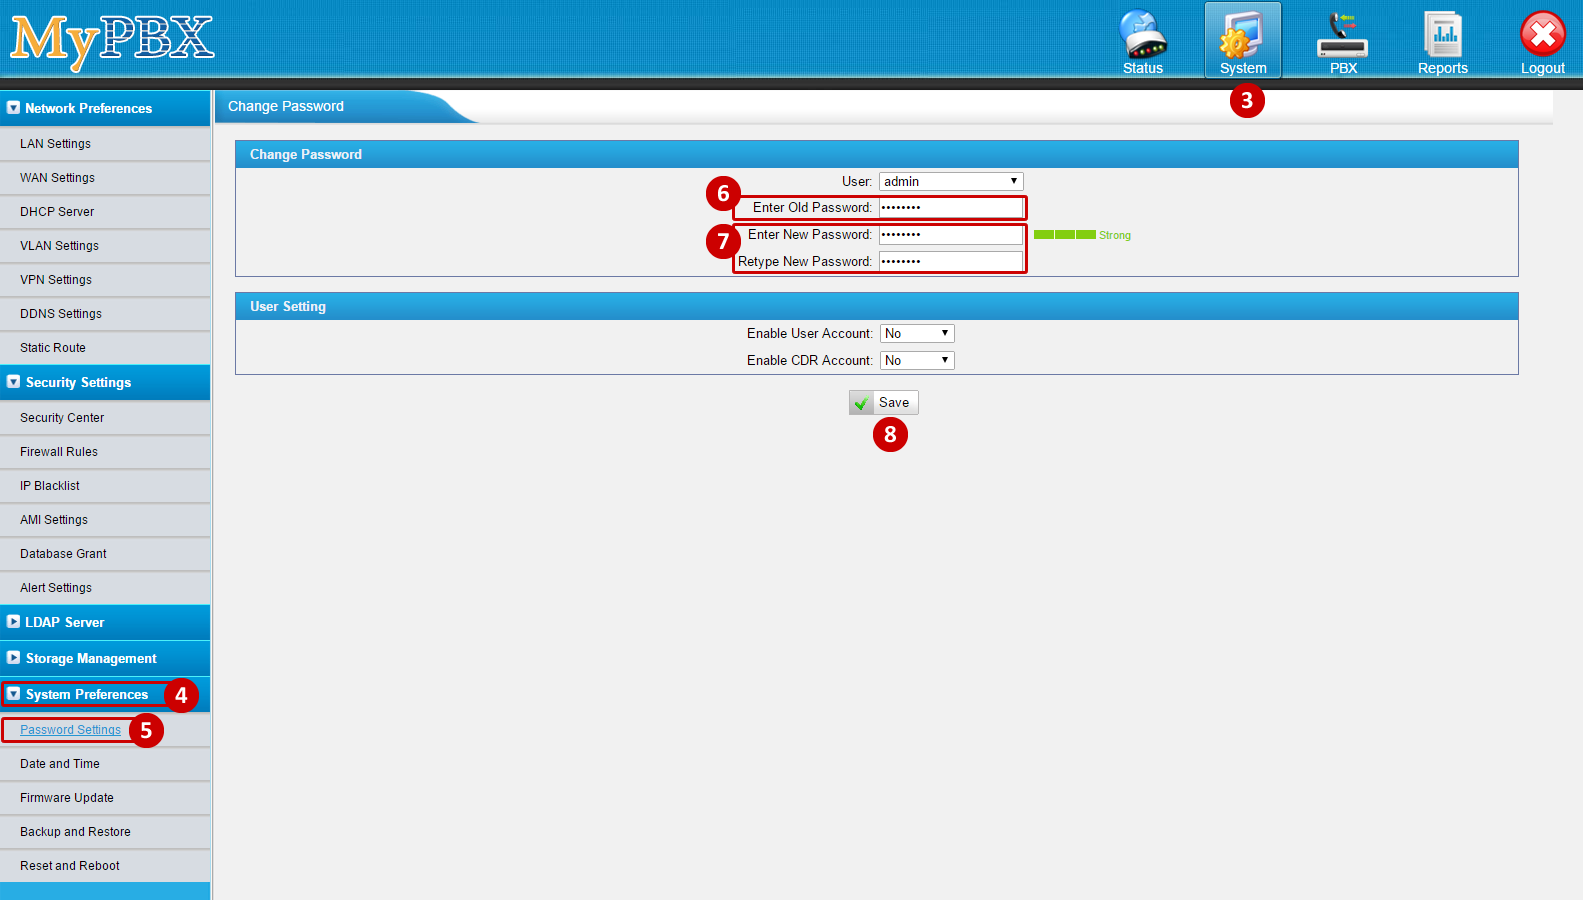
- To change the default password, click on System
- Find System Preferences
- Go to Password Settings
- Enter Old Password (default password)
- Enter New Password (twice to confirm)
- Click Save
Change IP Address & Time Zone
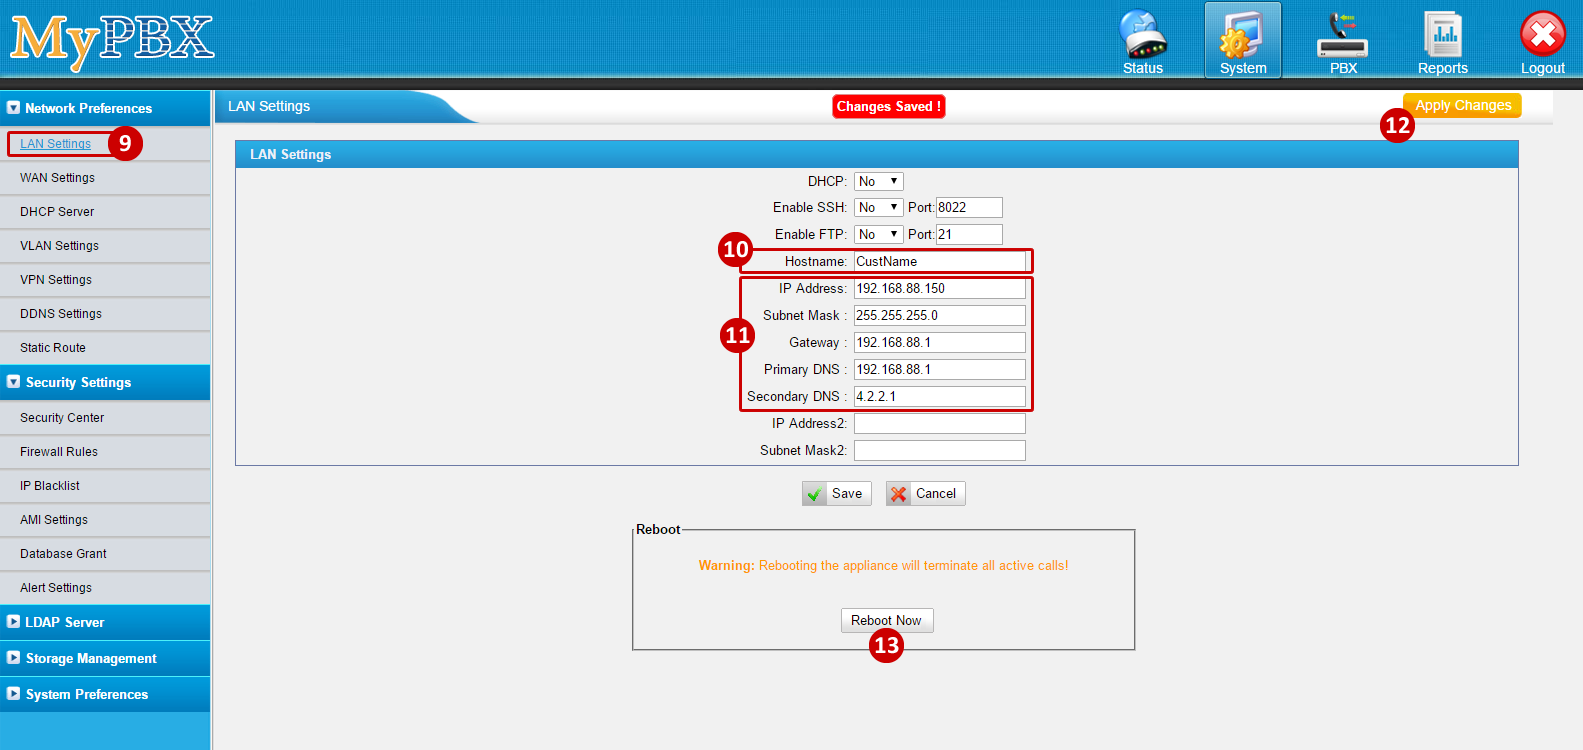
- To change the LAN IP address, click on LAN Settings
- Enter a Hostname (Customer Name)
- Enter the new LAN IP, for this example:
- IP Address: 192.168.88.150 (assign as needed)
- Subnet Mask: 255.255.255.0
- Gateway: 192.168.88.1
- Primary DNS: 192.168.88.1
- Secondary DNS: 4.2.2.1
- Click Apply Changes
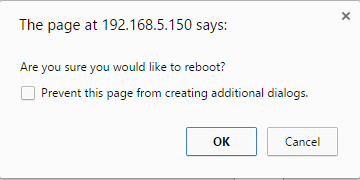
- Click Reboot Now (the system will provide a prompt, click OK)
- Change network settings if needed to access the new IP
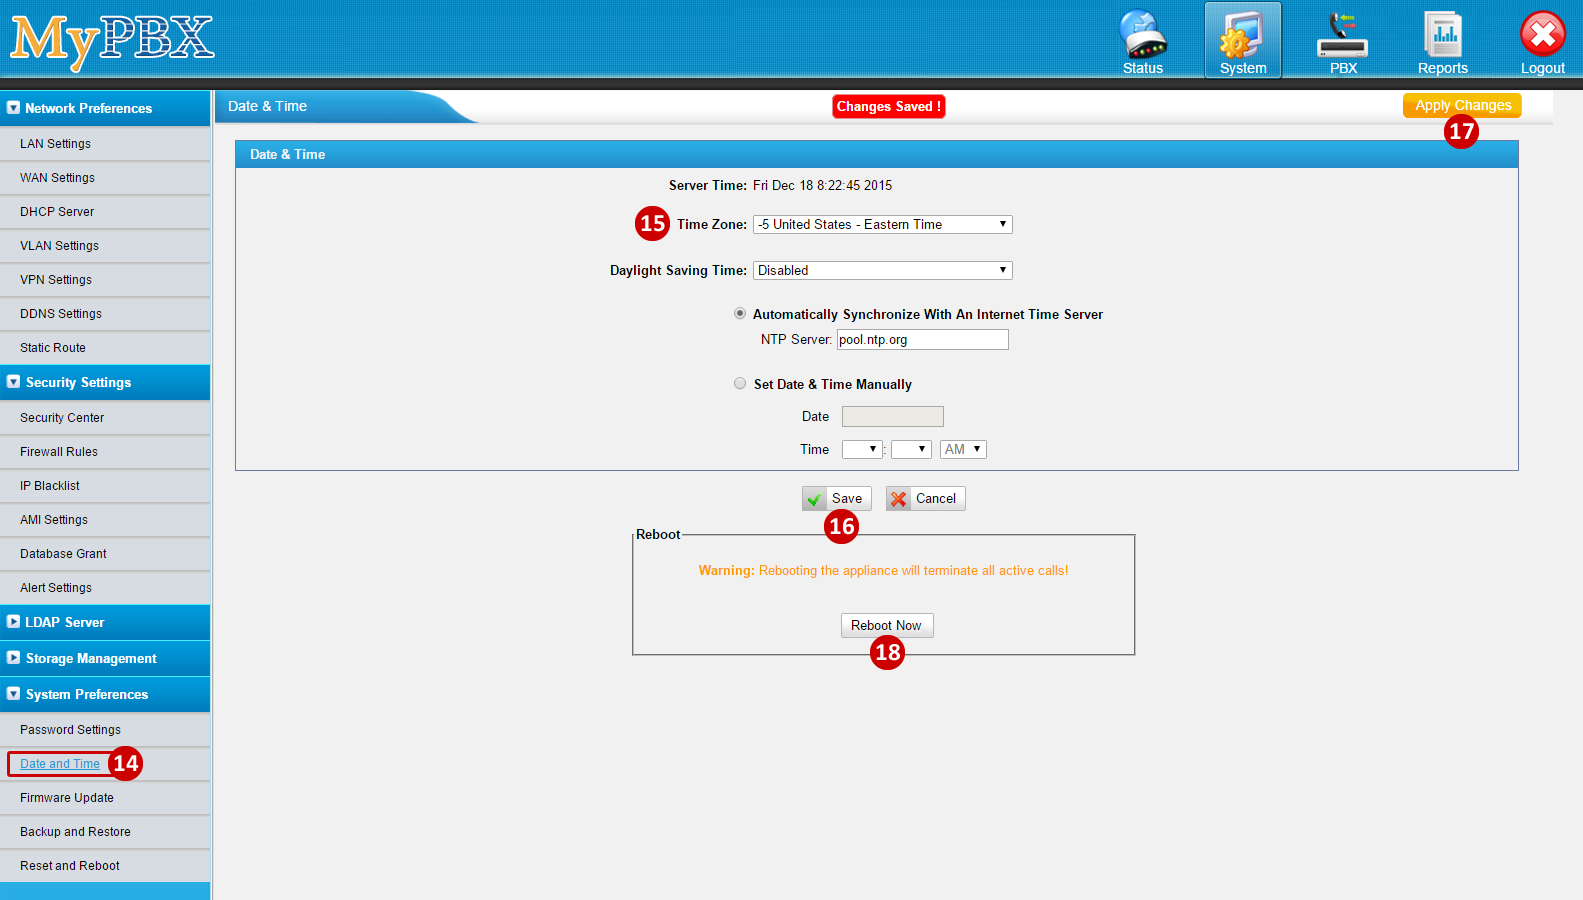
- To set the Date & Time, go to Date and Time (under System --> System Preferences)
- Select the Time Zone from the dropdown menu (e.g.: -5 United States - Eastern Time)
- Click Save
- Click Apply Changes
- Click Reboot Now
Adding VoIP Trunk
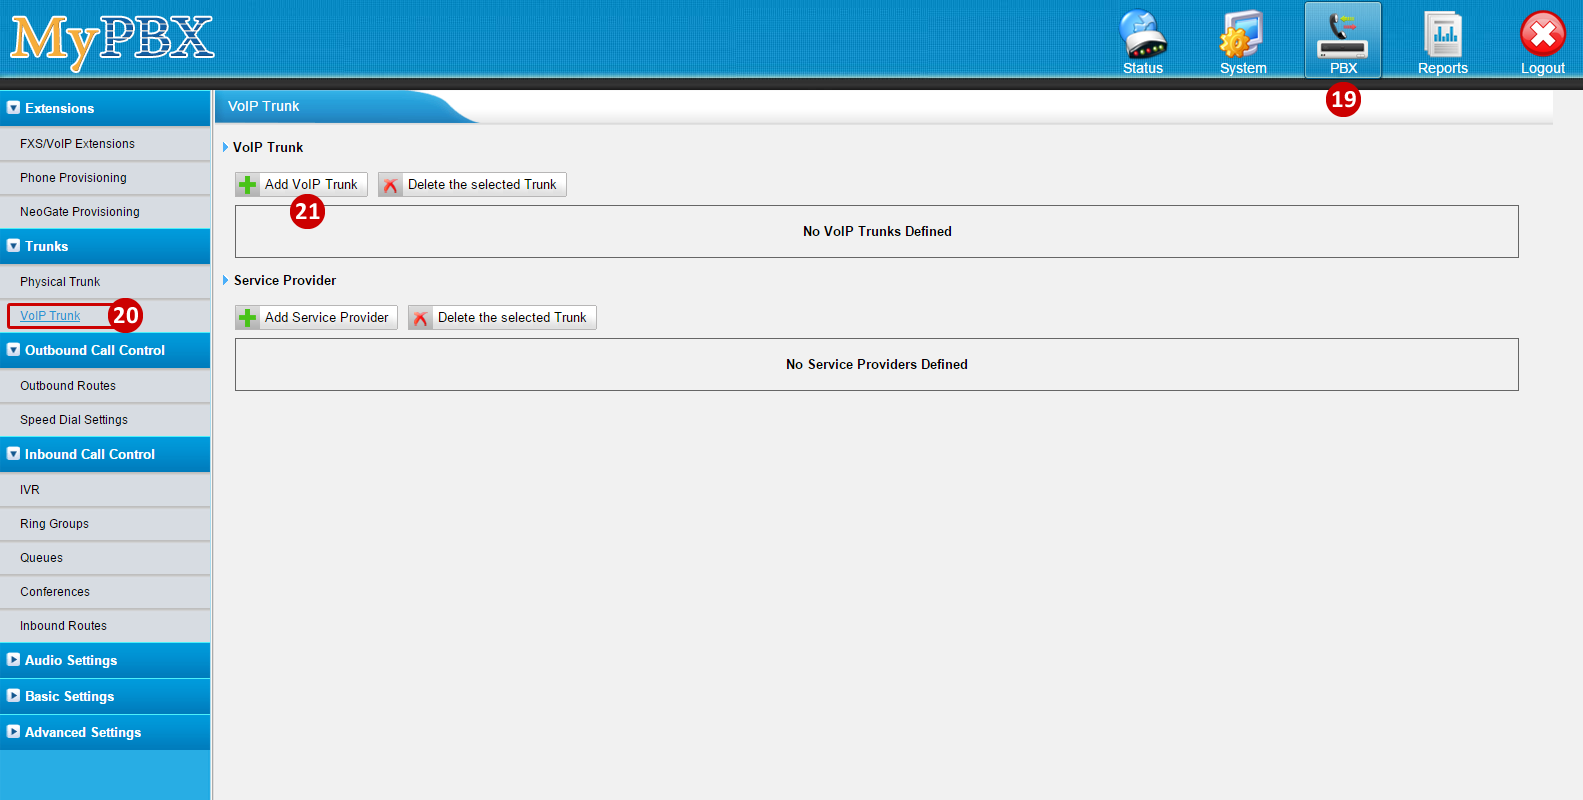
- To Add a VoIP Trunk, go to PBX
- Find Trunks and click on VoIP Trunk
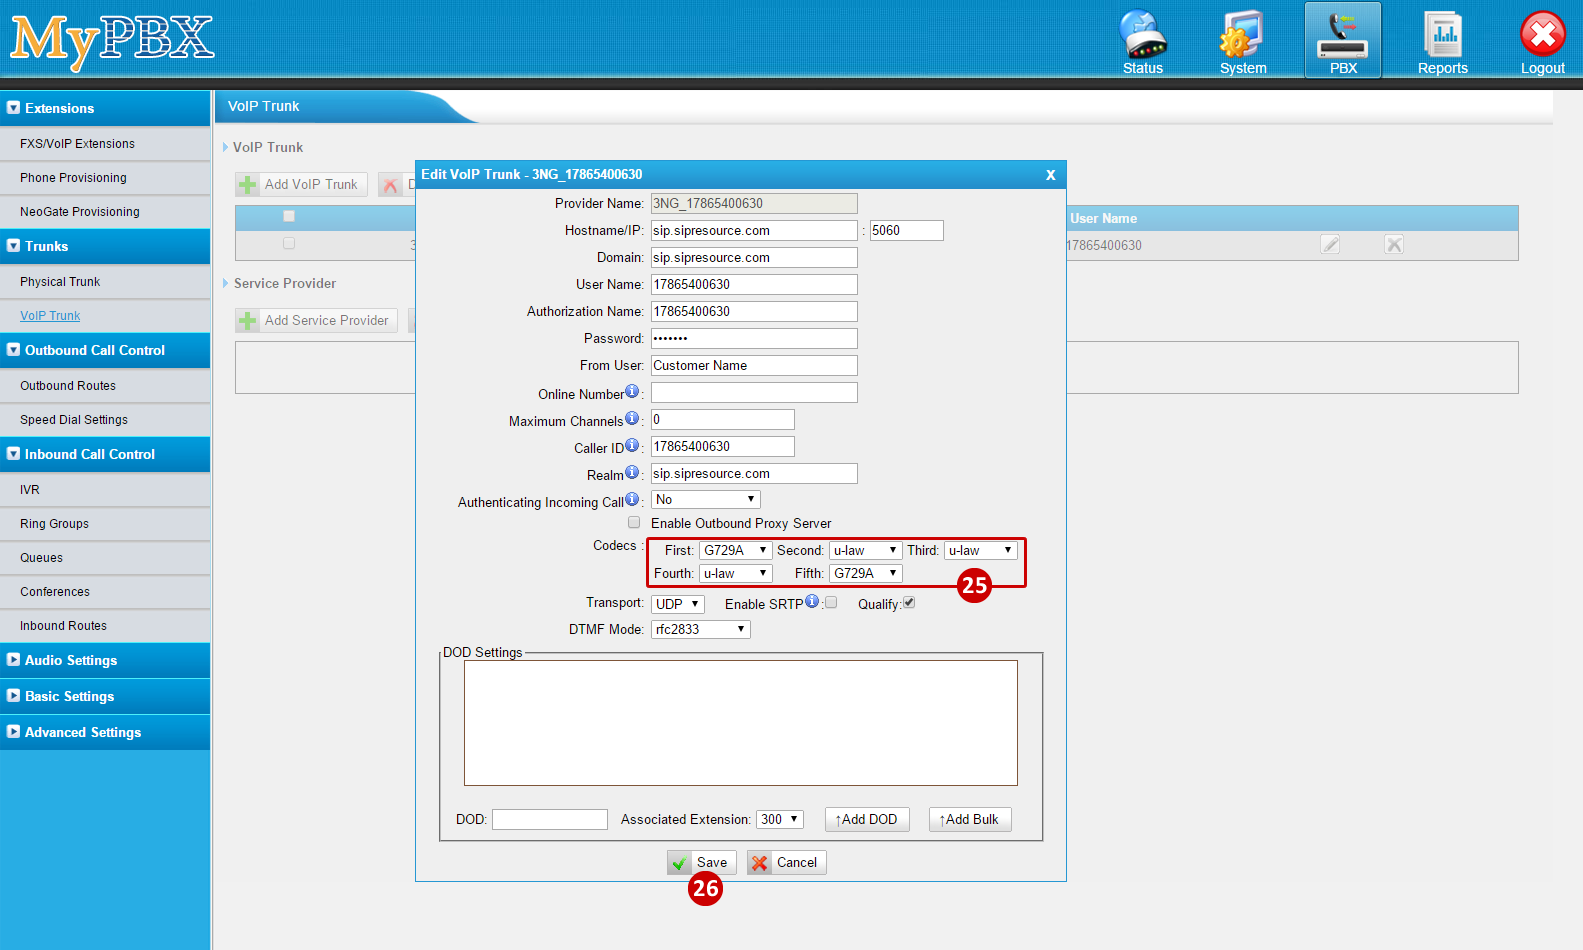
- Click on Add VoIP Trunk
- From the Add VoIP Trunk popup please add the following:
- Provider Name: 3NG_17865400630 (use the account you wish to register)
- Hostname/IP: sbc.ringlogix.com
- Domain: sbc.ringlogix.com
- User Name: 17865400630 (use the account you wish to register)
- Authorization Name: 17865400630 (use the account you wish to register)
- Password: User the service password
- From User: 17865400630 (use the account you wish to register)
- Caller ID: 17865400630 (use the account you wish to register)
- Ream: sbc.ringlogix.com
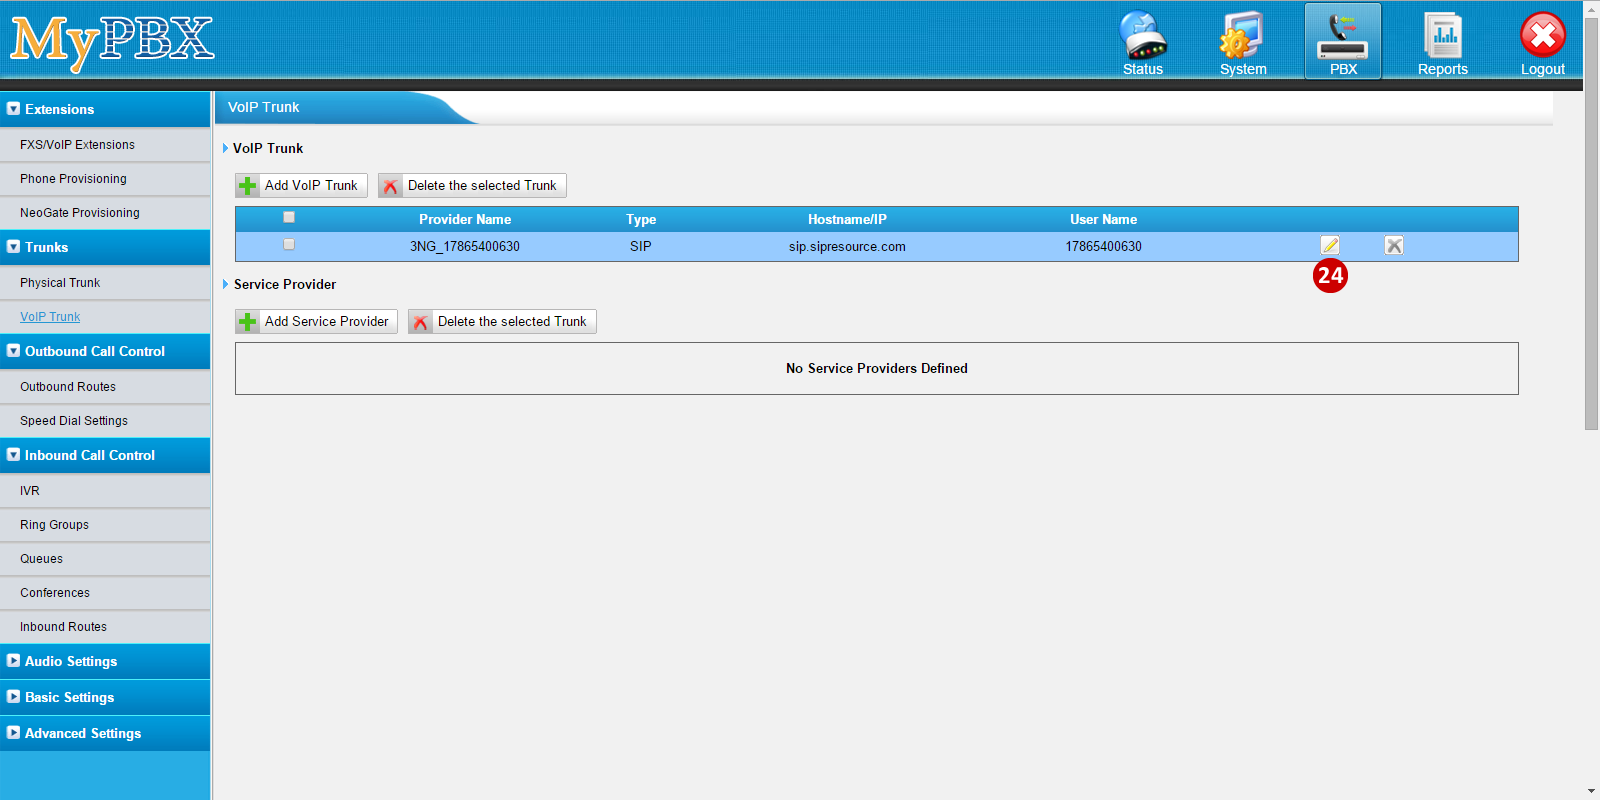
- Click Save and Apply Changes
- The Trunk needs to be edited, click on the Pencil icon to edit
- Find the Codecs and select G729A and u-law
- Click Save

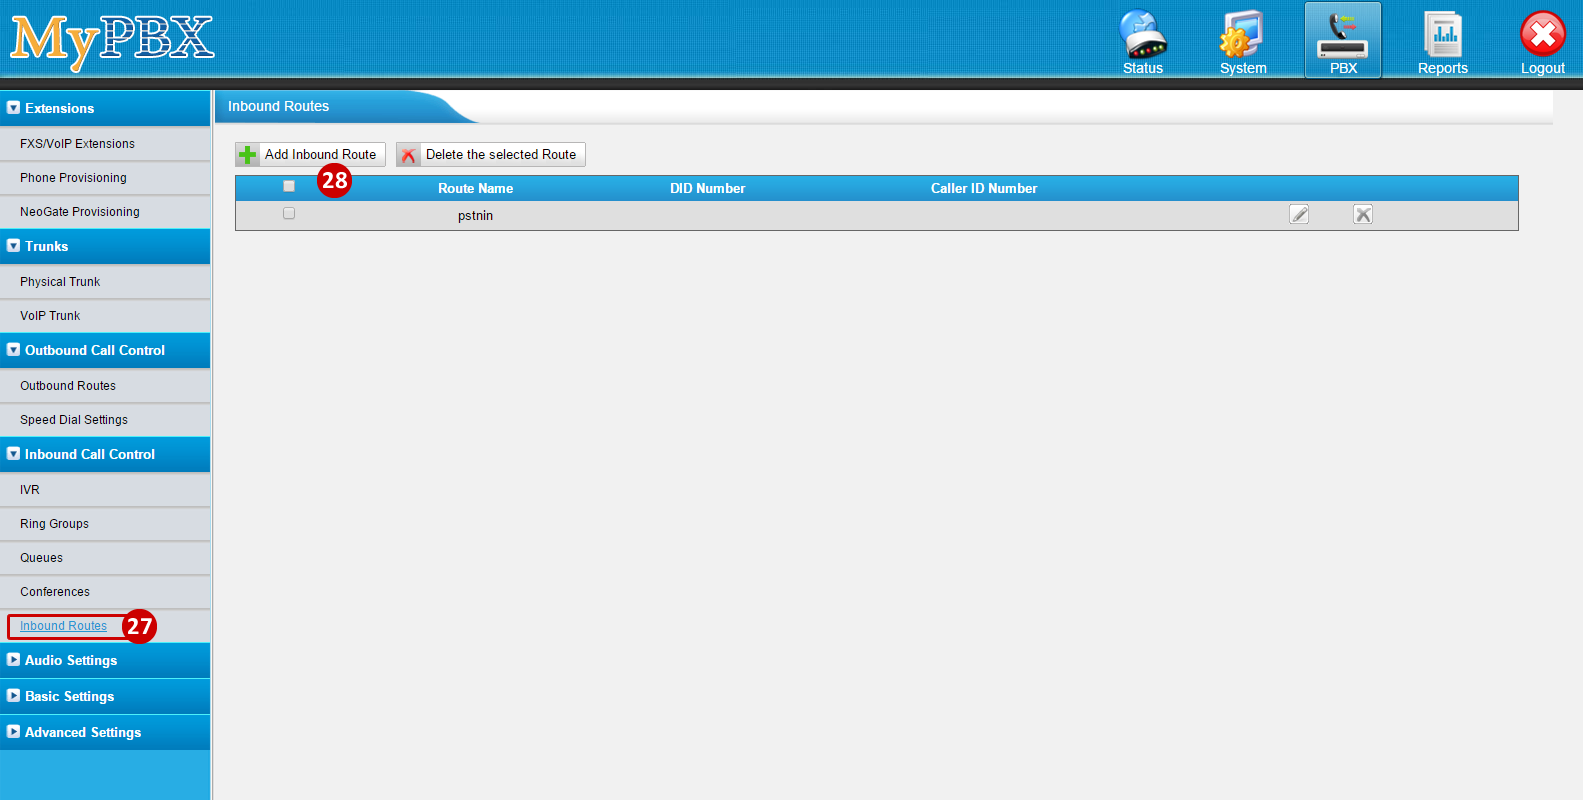
Inbound & Outbound Routes
- To Add an Inbound Route, click on Inbound Routes (under Inbound Call Control)
- Click Add Inbound Route
- Add the Route Name (e.g.: 3NG_17865400630)
- Select the trunk from the Available Trunks and move to the Selected
- Adjust the call routing of the Inbound Trunk
- Click Save
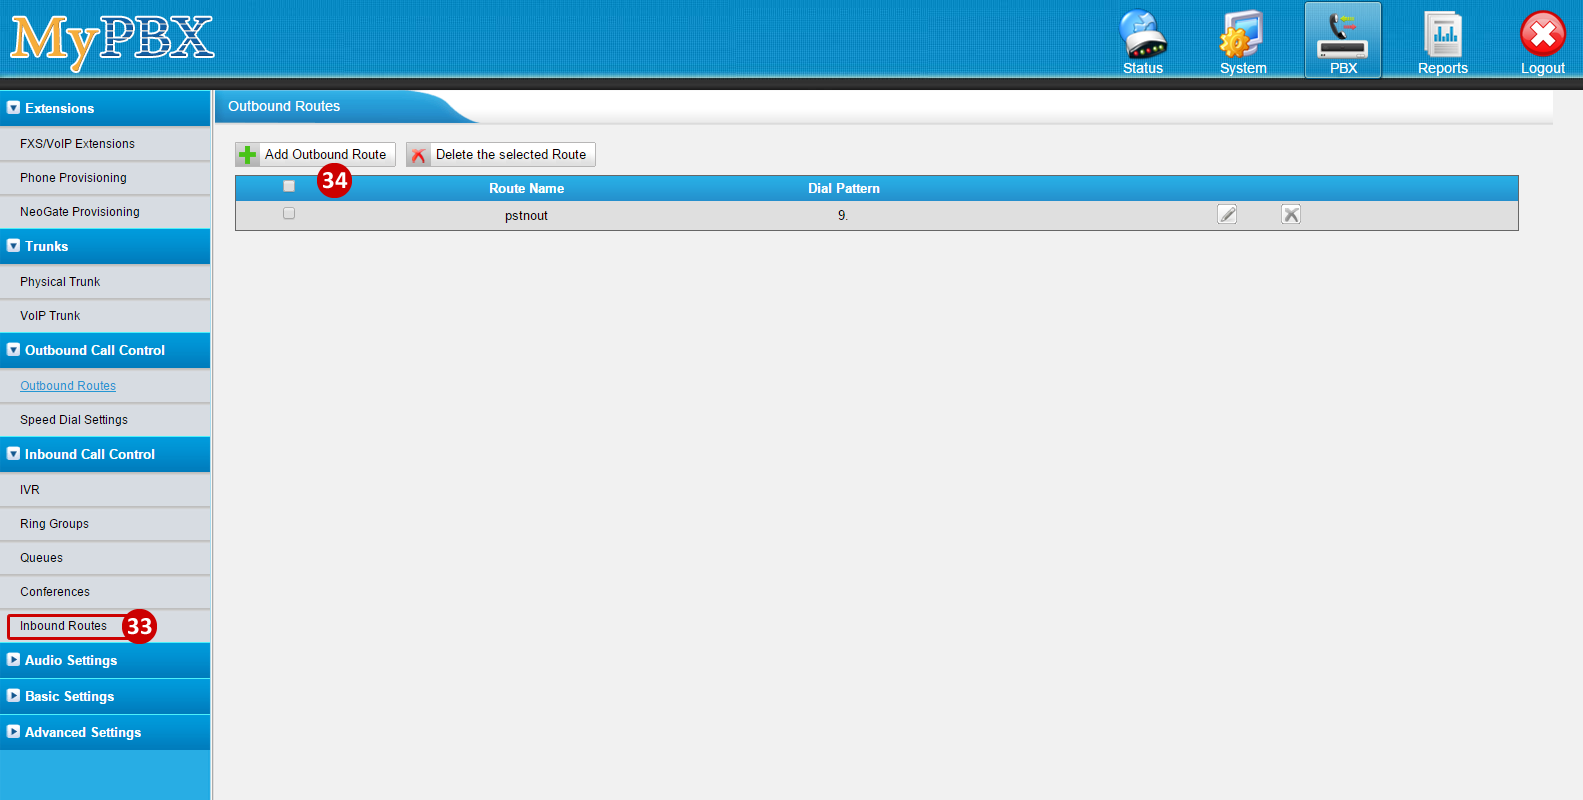
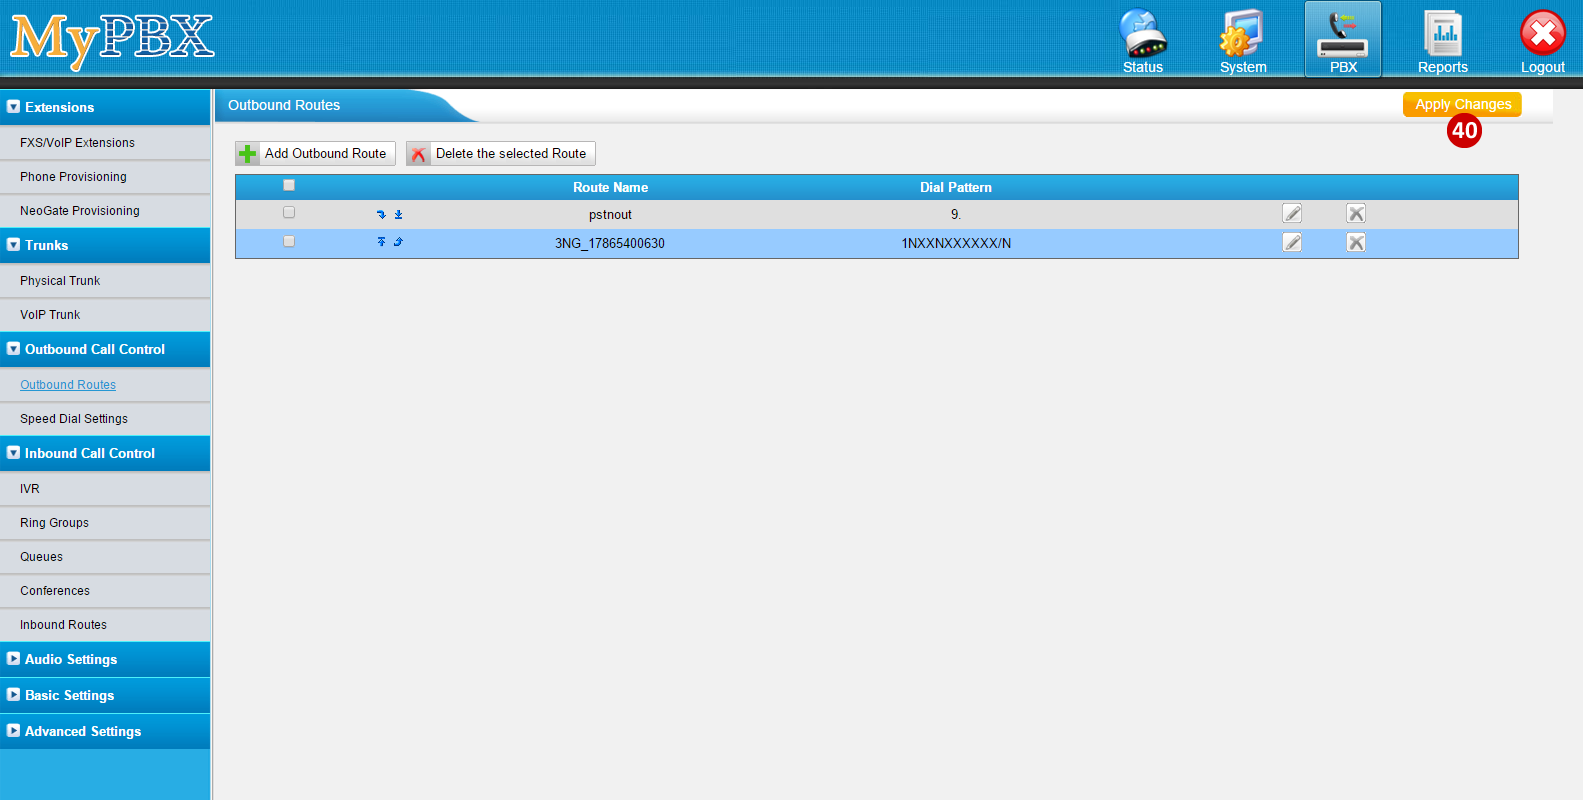
- To add an Outbound Route, click on Outbound Routes (under Outbound Call Control)
- Click on Add Outbound Route (by default the system has a PSTN out, which requires a 9 to dial out)
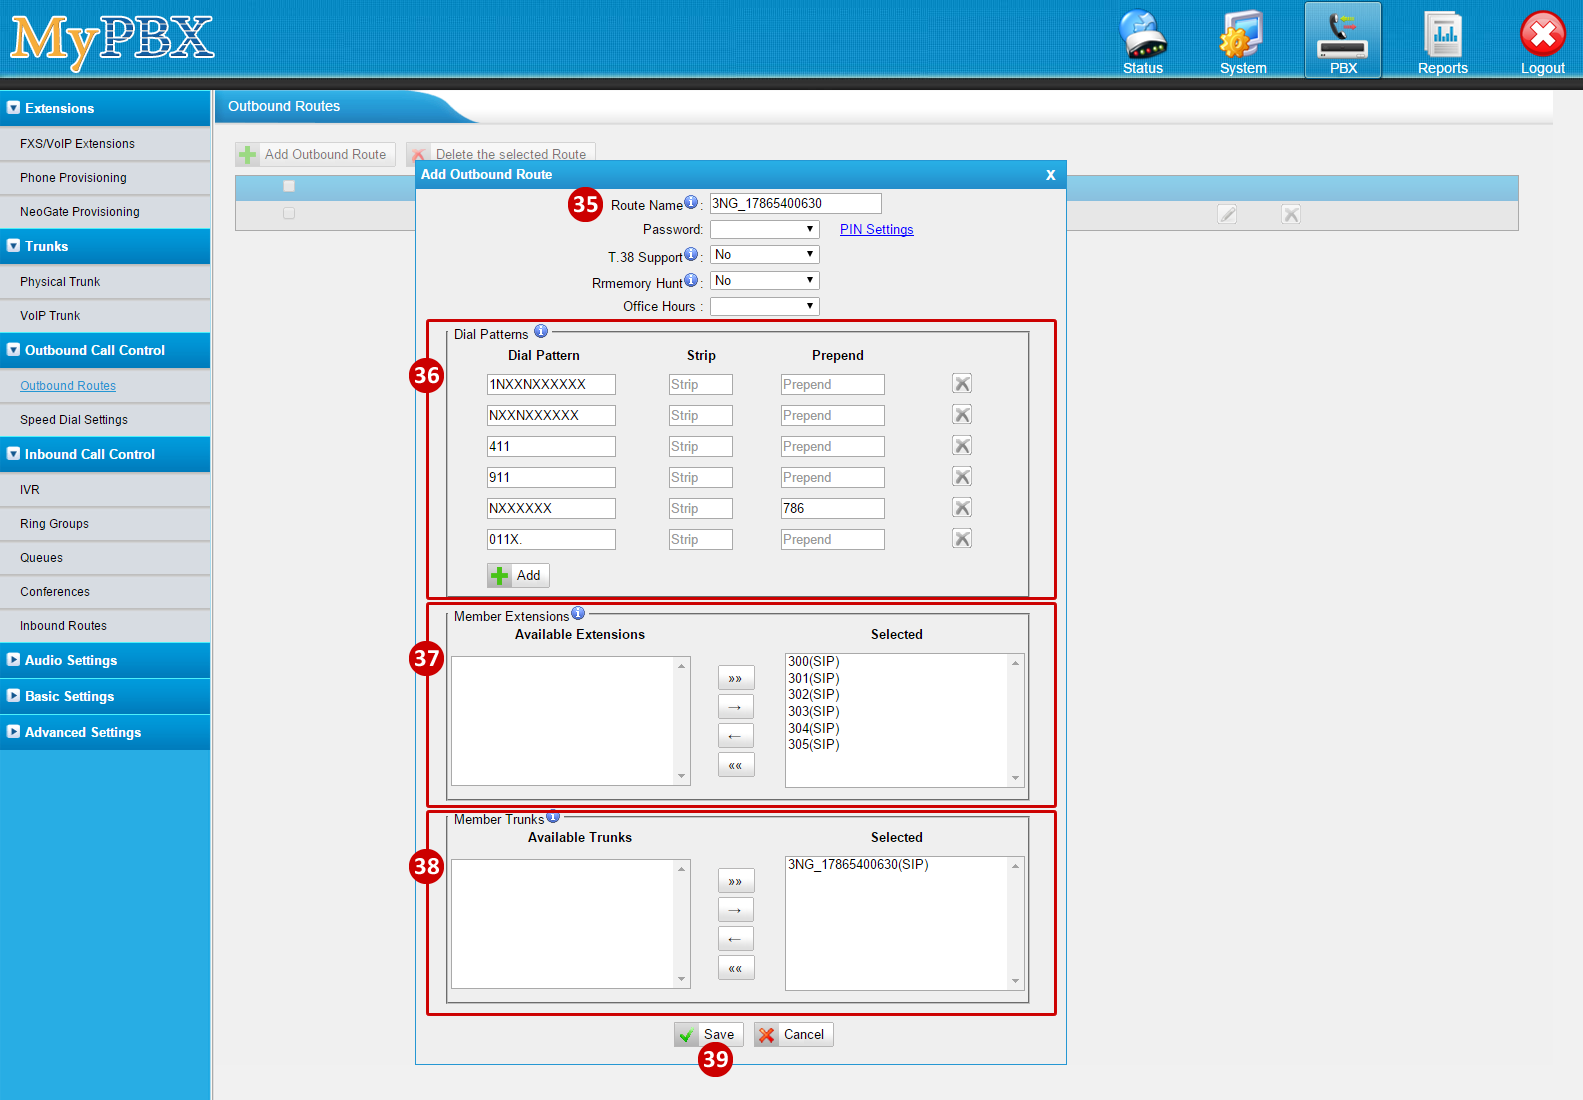
- Add the Route Name (e.g.: 3NG_17865400630)
- Add Dialing Patterns
Domestic:
1NXXNXXXXXX
NXXNXXXXXX
411
911
Local:
NXXXXXX
International:
011X.
- Select the extensions from the Available Extensions and move to the Selected to allow to use the outbound route
- Select the trunk from the Available Trunks and move to the Selected to use for outbound calls
- Click Save
- Click Apply Changes

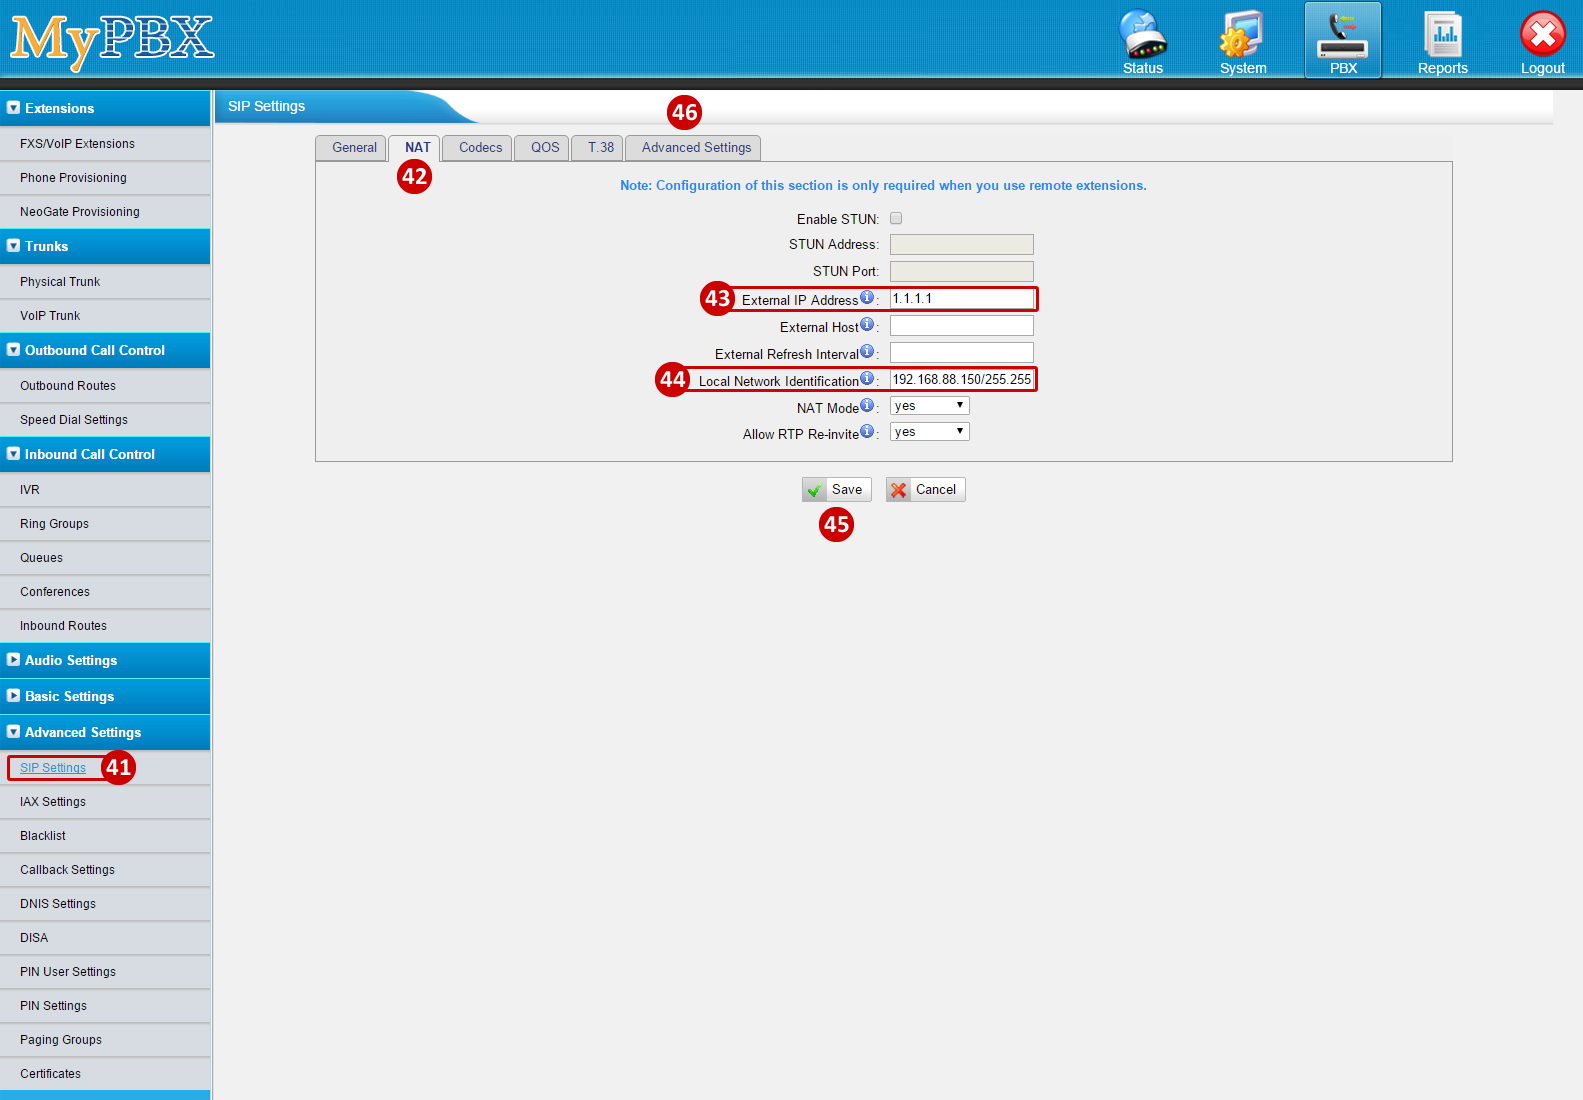
NAT & To Header
- To set the NAT go to SIP Settings (under Advanced Settings)
- Click on the NAT tab
- IF the PBX is behind NAT and has a Private IP SKIP THIS STEP.
IF the PBX has a PUBLIC IP then set it on the External IP Address Field.
- Set the Local Network Identification: 192.168.88.150/255.255.255.0 (LAN IP and Subnet)
- Click Save
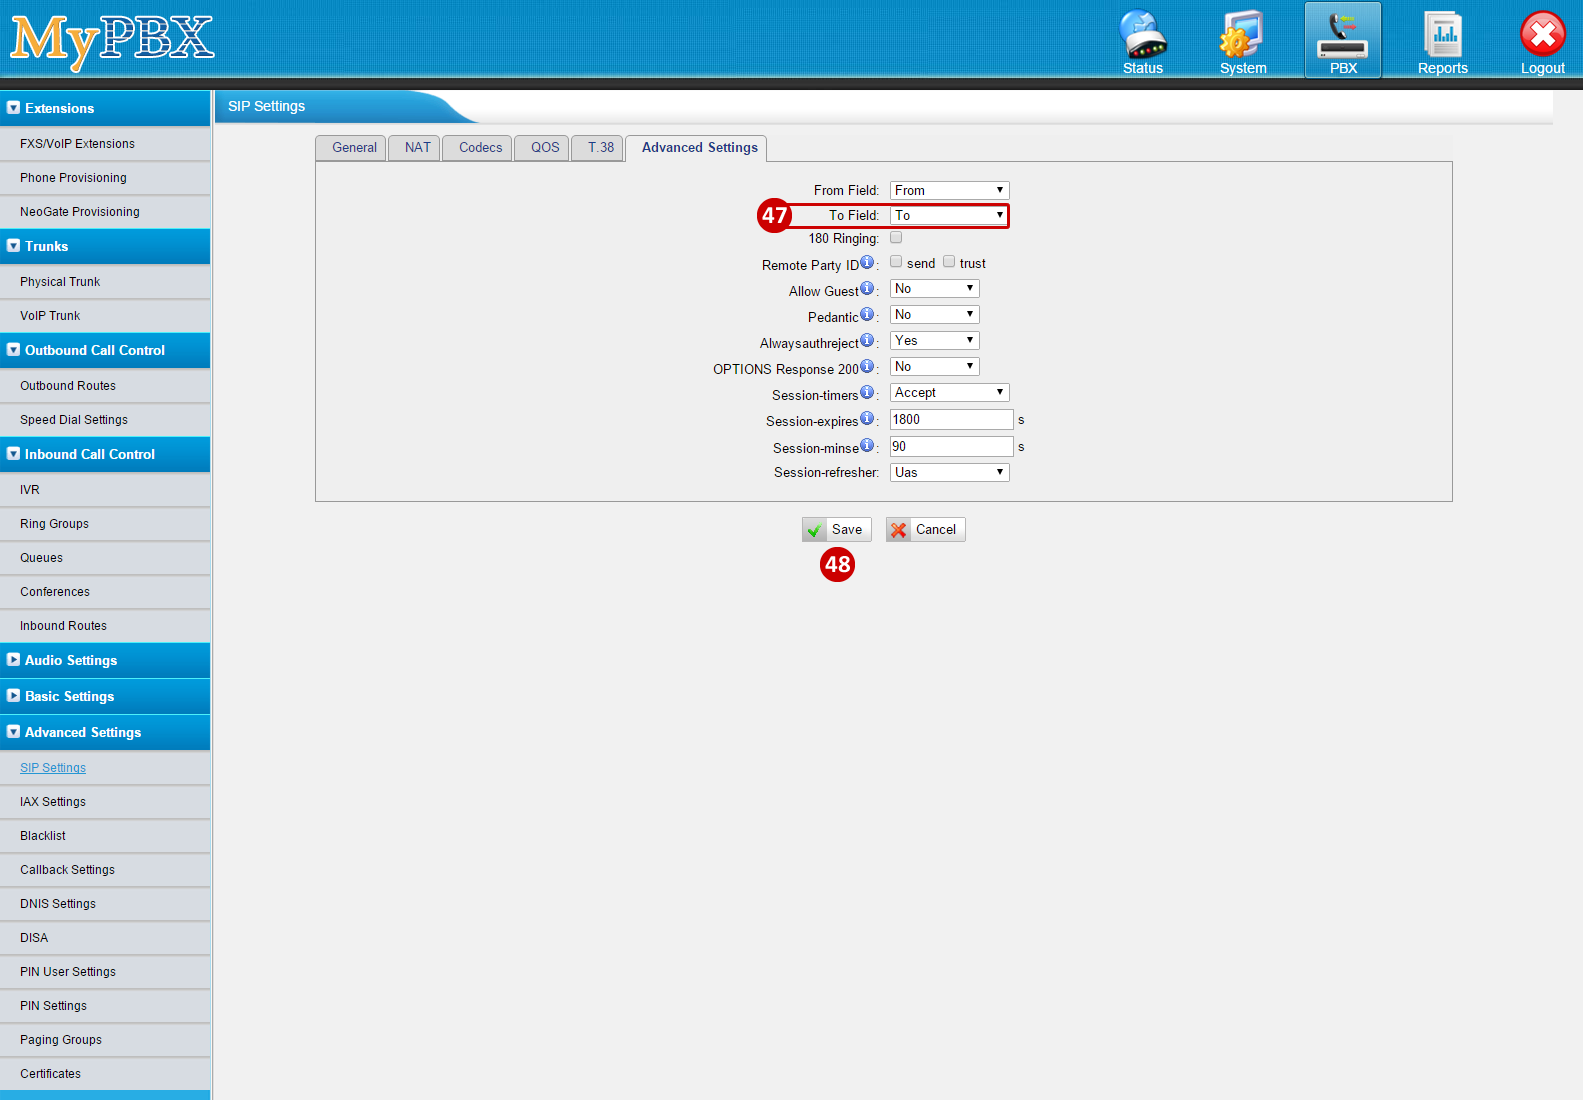
- To allow for routing based on the To Header, go to the Advanced Settings tab
- From the To Field, select To from the dropdown menu
- Click Save
|
 (0 vote(s)) (0 vote(s)) Helpful Not helpful
|
