|
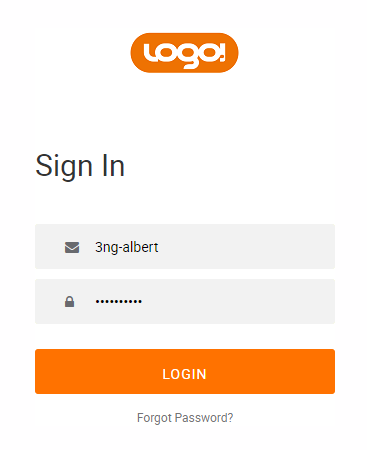
Partners can brand the portal with their own logo and color theme. Whenever your staff or customers login your company branding will be shown to them.
To setup your custom branding
- Login to the RingLogix App.
- Click the down arrow next to your name on the top right of the browser.
- Select Settings.
- Click Edit on the Custom Branding section.
- Make your changes. See below for field details.
- Click Save.
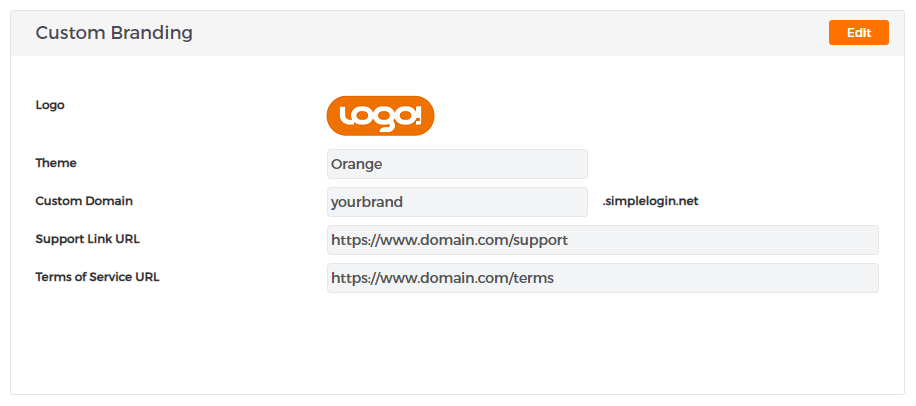
Branding Fields Explained
- Logo: This logo will be displayed in the header of all system pages. It will also be shown on the login page when using your custom domain below. The allowed file formats include .jpg, .jpeg, .bmp and .png. The resolution should not exceed 150x50 px.
- Theme: Select a color theme that best matches your brand.
- Custom Domain: You and your customers can use this URL to log in to the platform. RingLogix will provide and maintain all required SSL certificates and no domain configurations are needed on your behalf.
- Support URL: Enter the URL of your help desk for your customers. When your customers log in they will see a Support Center link in the header and clicking that link will take them to this URL. If this is left _blank then your customers will not see a Support Center link in the header.
- Terms of Service URL: Enter the URL where your terms of service are hosted. This is usually a page on your main website. This field is required to access and use the Quoting system. It is also included in all service quotes sent to your customers.
Sample login with custom domain
| 