|
Cisco SPA8000 Configuration Guide
Posted by , Last modified by Albert Diaz on 27 August 2018 02:17 PM
|
|
Find the IP address of the Cisco SPA8000.
- Connect an analog phone to the first FXS port.
- From the analog phone dial **** (four asterisks).
- Then press 110# to determine the IP address (the system will speak the address, EXAMPLE: 192.168.1.130).
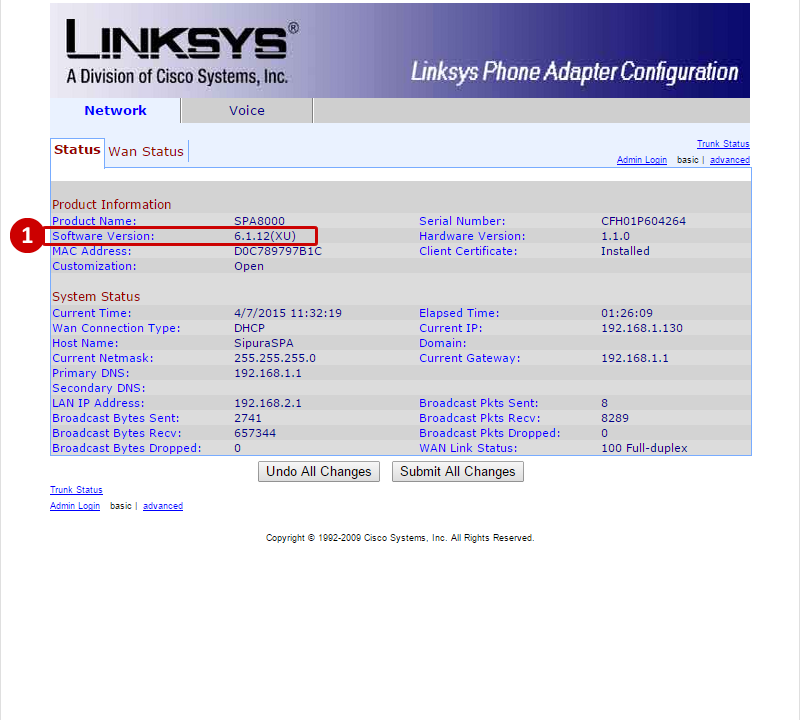
Once logged into the SPA8000 do the following to configure the phone.
- Find the Software Version (firmware) and make sure it is on the latest firmware. When this article was produced, it was on firmware 6.1.12(XU).
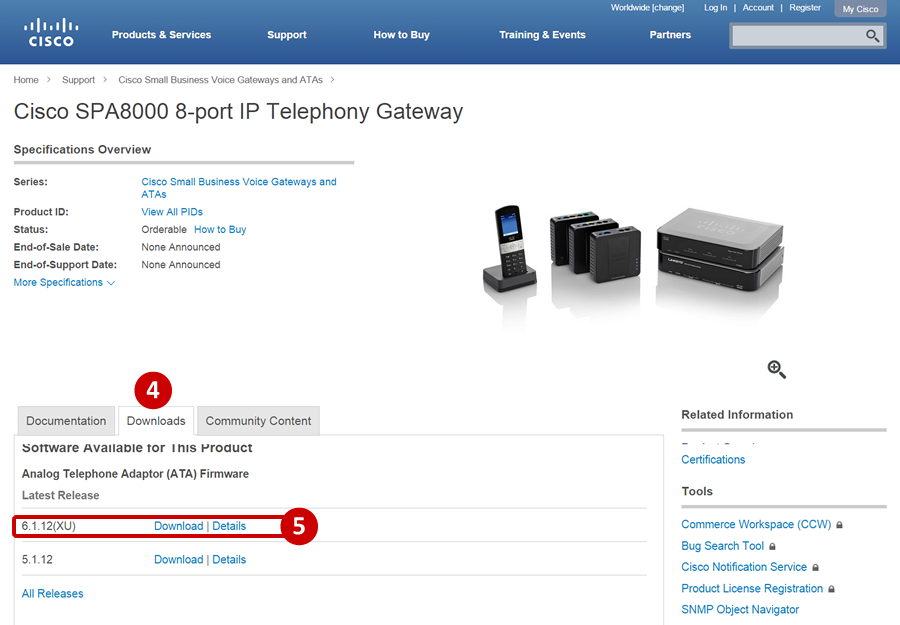
- Go to Cisco's website to download the firmware by clicking Support.

- Search for SPA8000 and click on the search result.
- Click on the Downloads tab.
- Find the latest release and click Download.
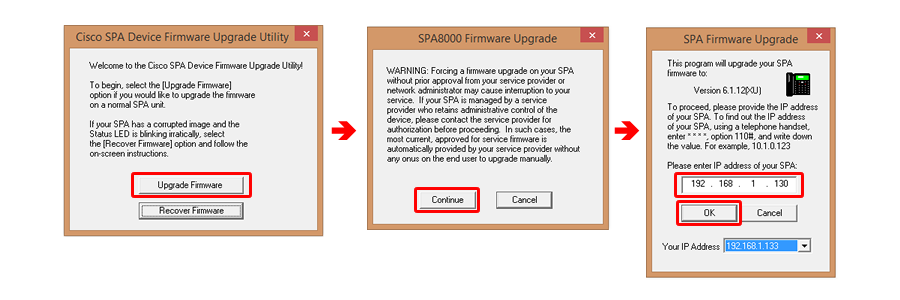
- Extract the EXE from the ZIP file and click on Upgrade Firmware, Continue, and enter in the IP of the SPA8000, then click OK.
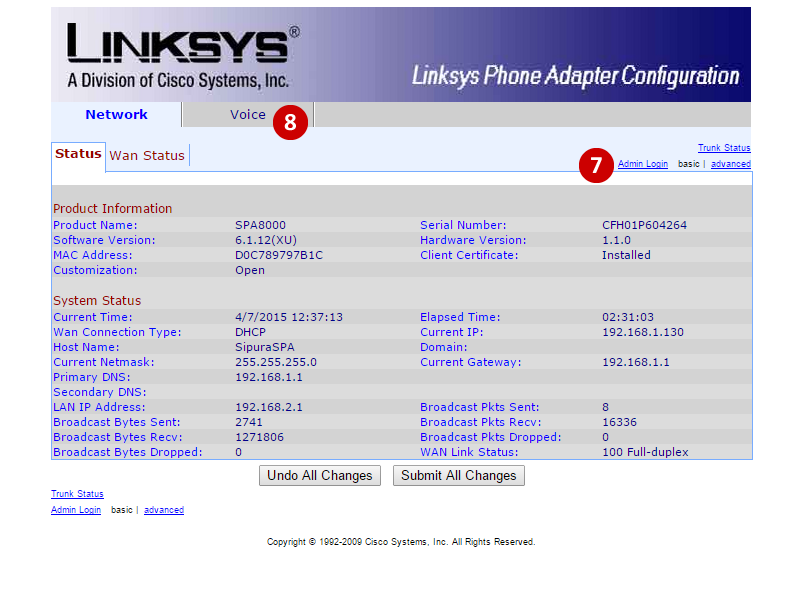
- Click on Admin Login.
- Click on Voice tab at the top.
- From the Voice tab, click on Advanced on the right.
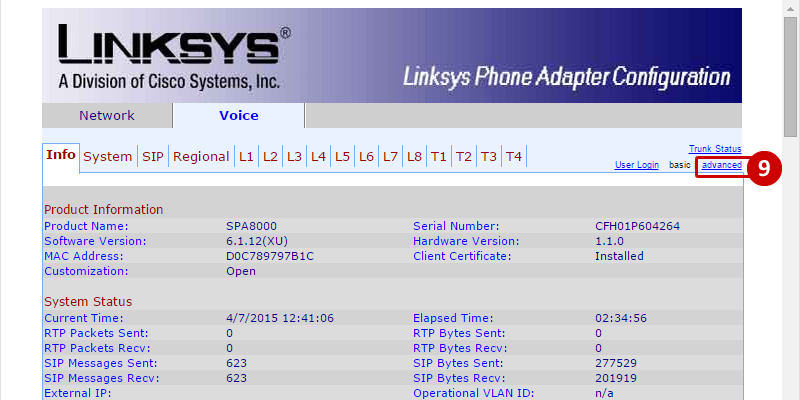
- Click on T1 (for Trunk 1).
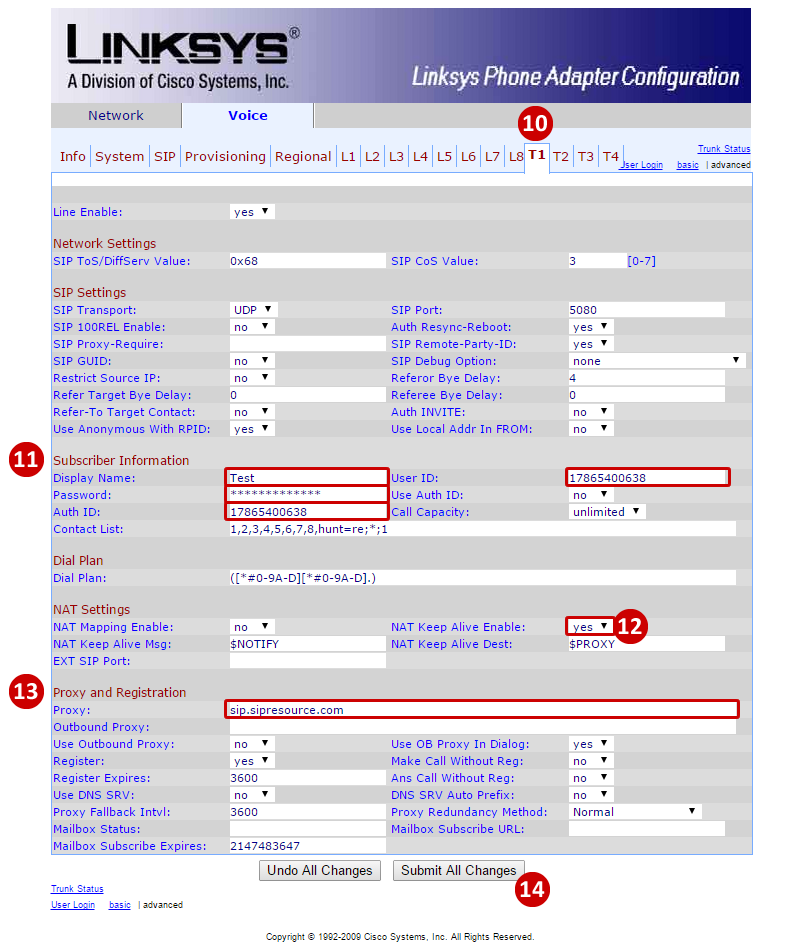
- Enter in the Display Name, User ID (Account ID), Password (Service Password), and Auth ID (same as User ID).
- Set NAT Keep Alive Enable to Yes.
- Enter in the host address for the Proxy. sbc.ringlogix.com.
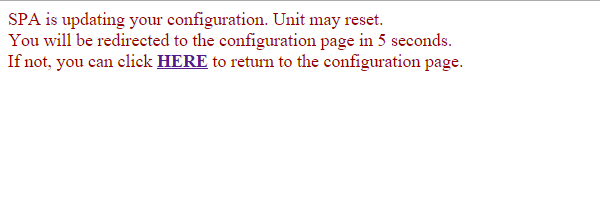
- Click Submit All Changes (You will get a message letting you know the SPA is updating your configuration).
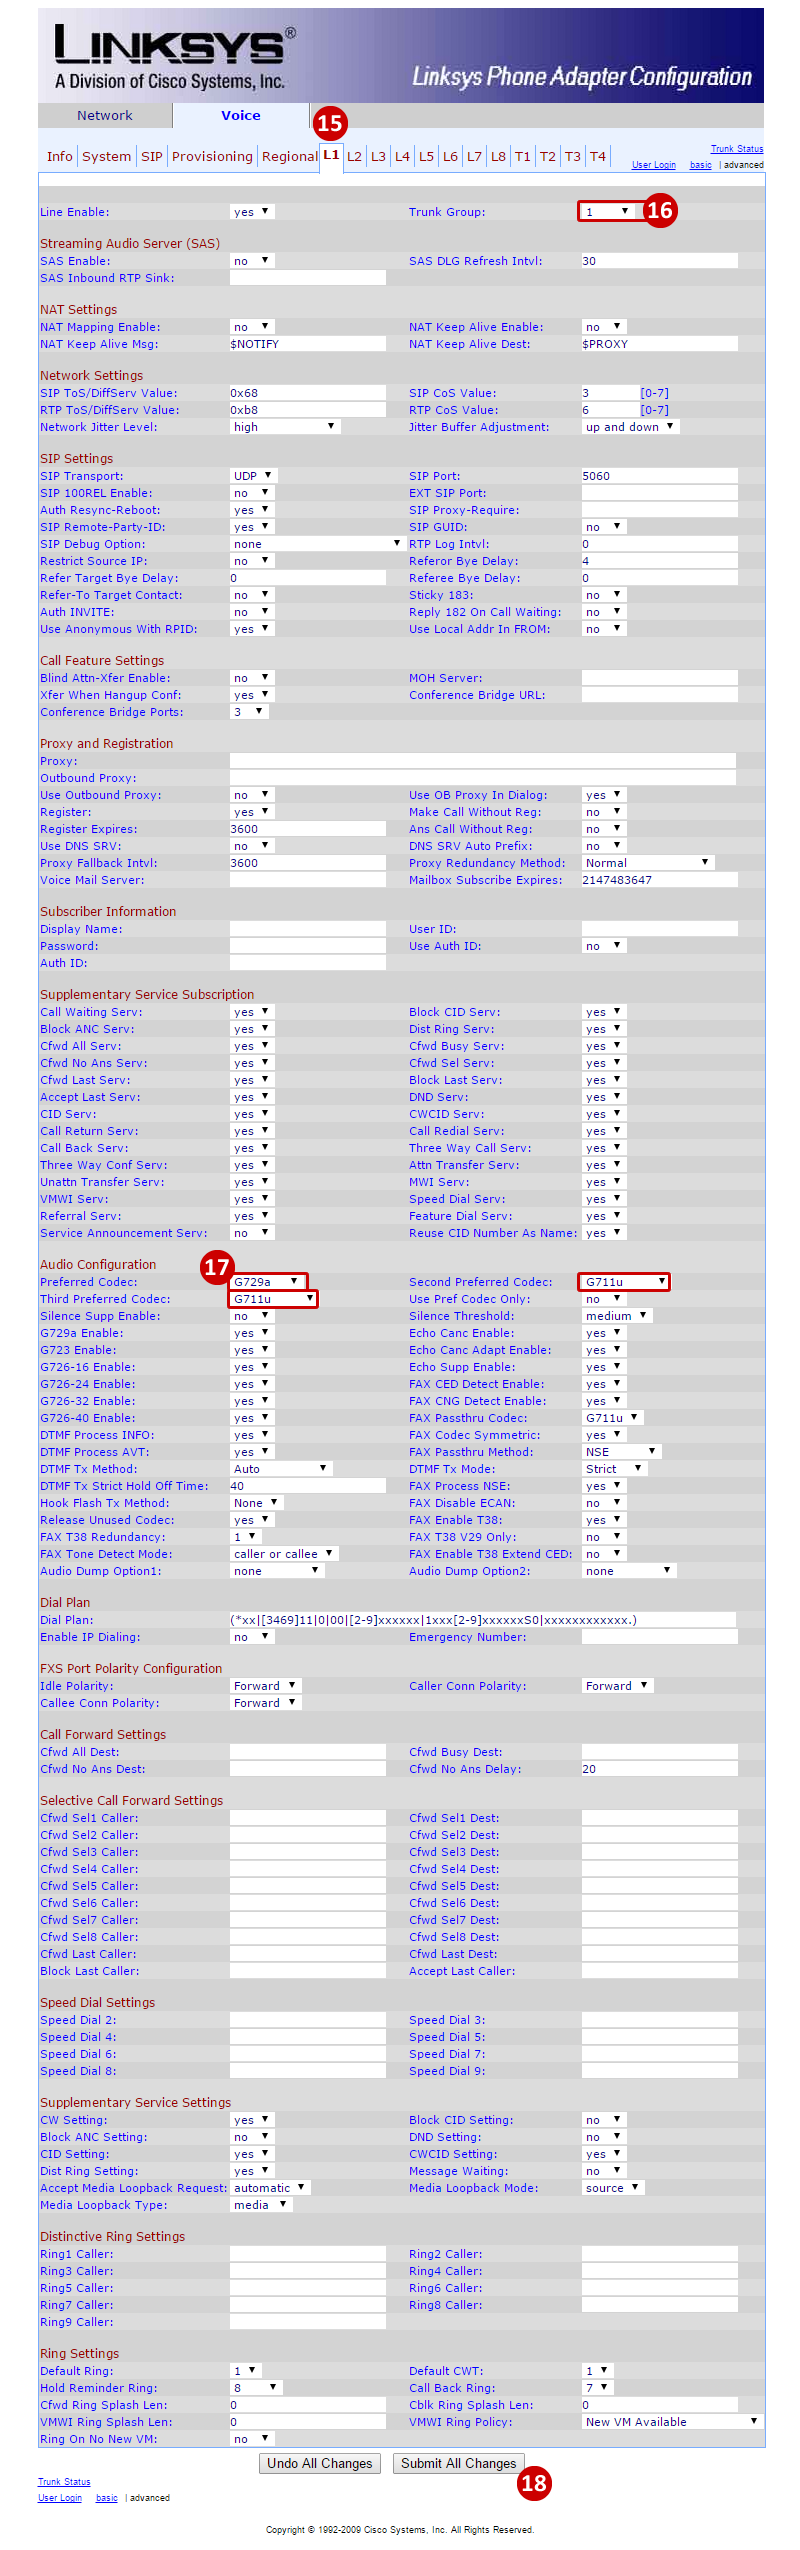
- from the Voice tab go to L1 (for Line 1).
- Set the Trunk Group to 1 (from T1).
- Select the Preferred Codecs (Preferred to G729a, Second Preffered to G711u, and the Third Preferred to G711u).
- Click on Submit All Changes.
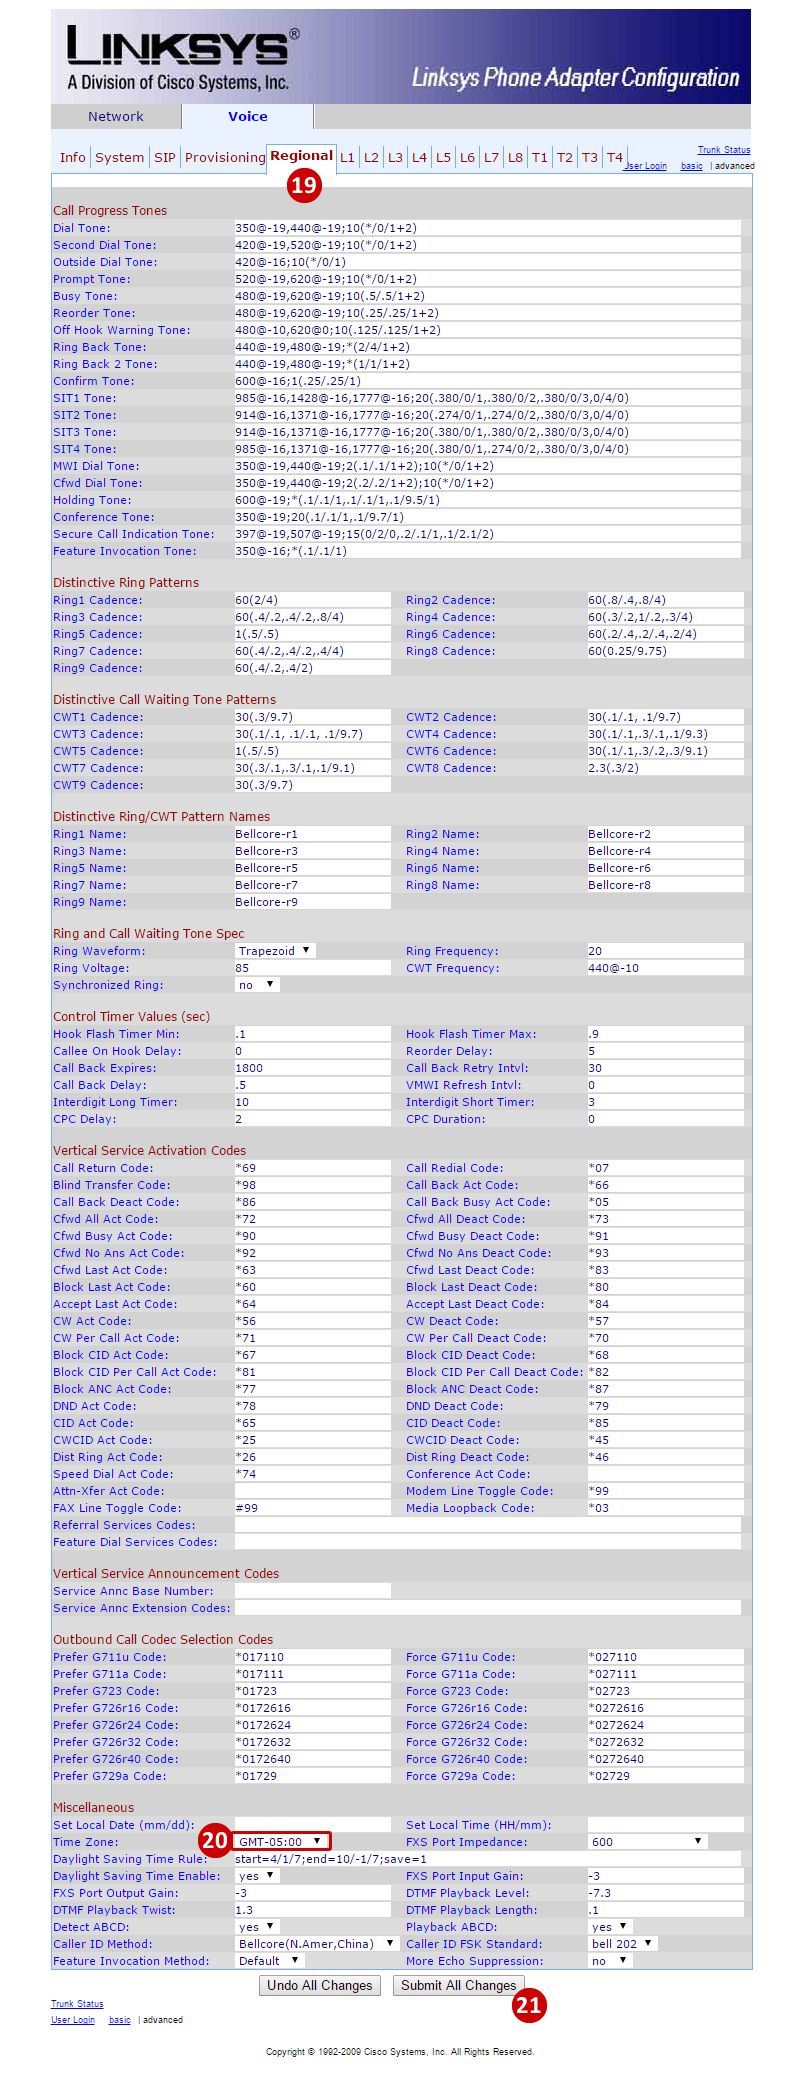
- From the Voice tab click on Reginal.
- Scroll down to Miscellaneous and find Time Zone. Select the Time Zone desired.
- Click on Submit All Changes.
|
 (3 vote(s)) (3 vote(s)) Helpful Not helpful
|
