Live Chat Software by Kayako |
Knowledgebase: Hosted PBX > Auto Attendants
|
Add / Edit an Auto Attendant
Posted by Albert Diaz, Last modified by Albert Diaz on 06 September 2018 12:04 PM
|
|
|
Auto Attendants are a great way to answer inbound calls with a professional greeting. They present callers with pre-configured routing options and alleviate the need to a full time receptionist. Some things to know.
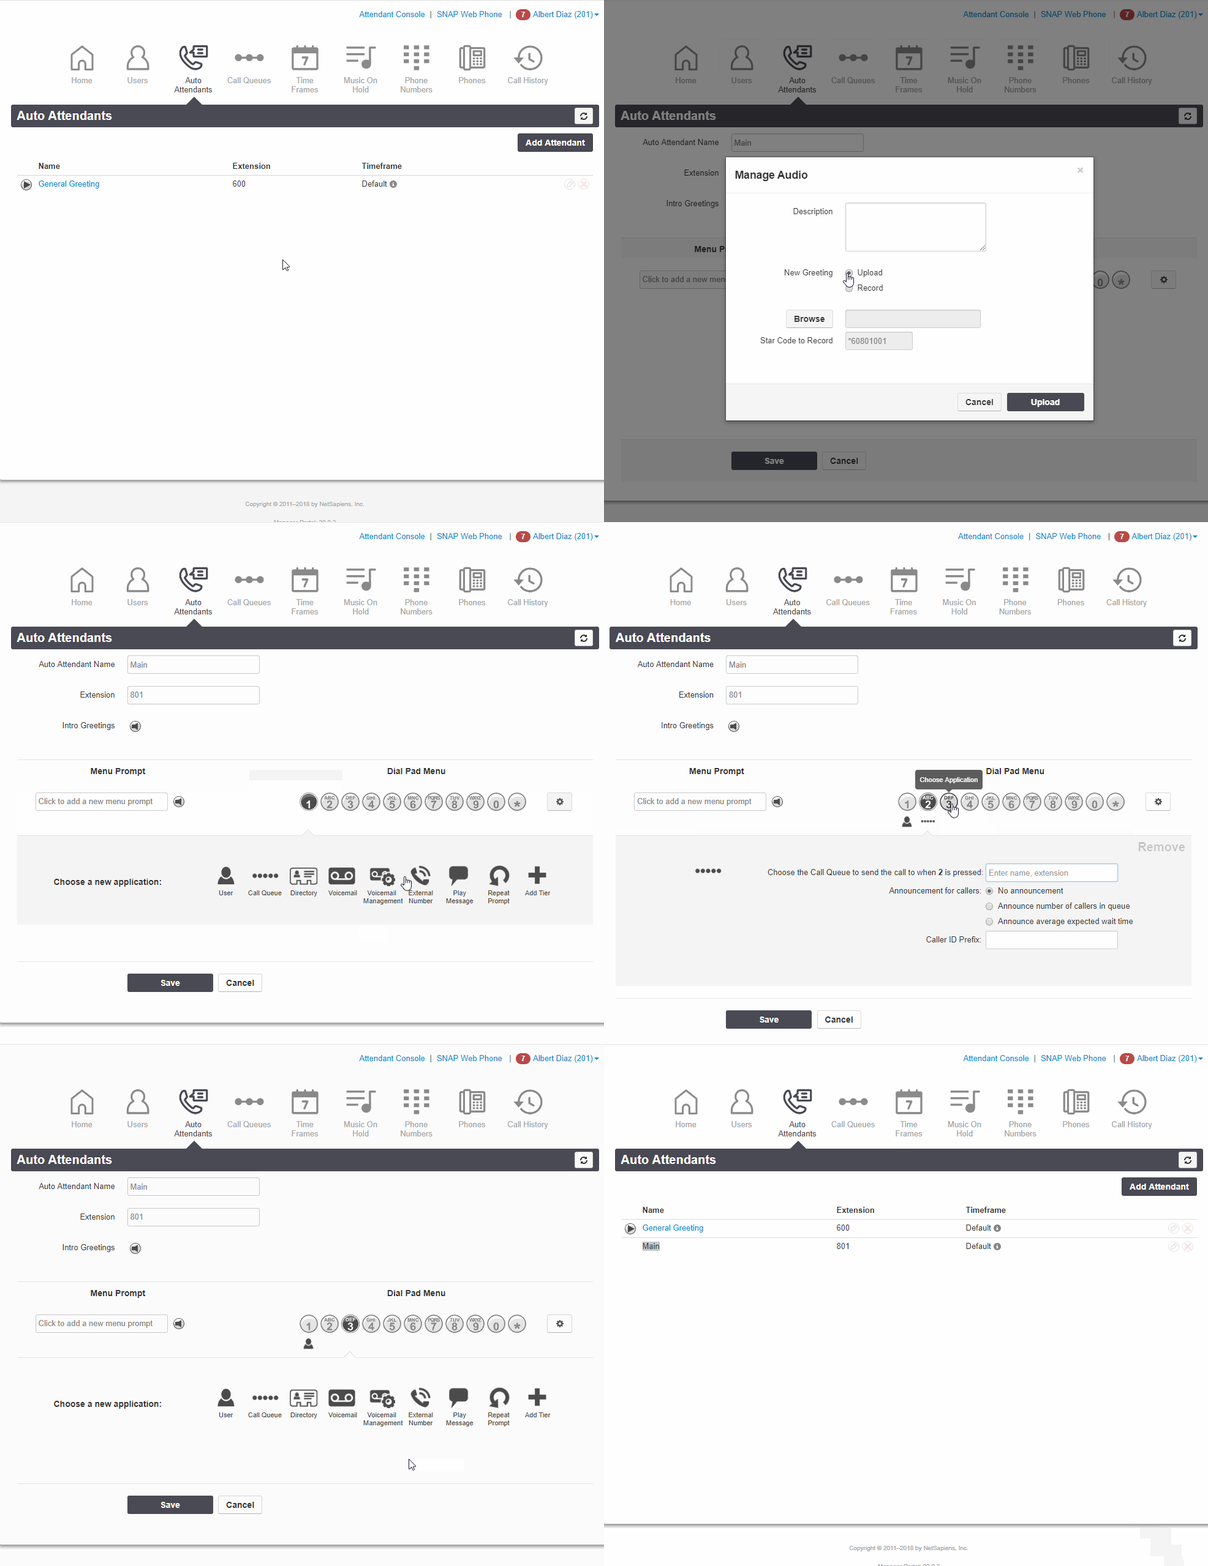
Create an Auto Attendant. This requires admin or office manager access. 1. Login to the PBX as an Admin of Office Manager. 2. Go to the Auto Attendant page and click Add Attendant. 3. On the Add Attendant window enter a Name, Extension number, and select the Time Frame "default all the time". You can use a custom time frame with special care and advanced knowledge of the routing methods. 4. Click Add 5. Click the Speaker icon to add your sound files. 6. Click a number option 1,2,3, etc... to configure what destination or feature it will route to when pressed. 7. Click the Settings icon for advanced functions. This is normally not needed. 8. Once finished click Save.  To Edit an Auto Attendant. This requires admin or office manager access. 1. Login to the PBX as an Admin of Office Manager. 2. Go to the Auto Attendant page and click Add Attendant. 3. Click the name of the menu you want to edit. 4. Make you changes and click Save. | |
|
|
Comments (0)
